
|
Do it yourself
| |||
| ||||


How to Read the Wiring Diagram of the Dacia Sandero?
Model: Dacia Sandero
B8
- Years 2012-2020
If you want to DIY on the electrical system of Dacia Sandero models produced from 2012 to 2020, it is essential to understand the wiring diagram to avoid mistakes or damage. 1. The connection code visible on the wire within the diagram identifies the function of a wire; 2. The junction point of two or more wires is called a node; 3. The area identified in the video is called a secondary component; 4. The two letters indicated in point 4 identify the colour of the connector; 5. Near the connector colour, you will also find the representation of that connector; 6. Point 6 in the video shows the representation of a connection; 7. The two letters near the connection represent the colour of the connector for that connection; 8. The number near the connector indicates the plate number to which the instrument is connected; 9. Nearby is the component number; 10. This point indicates the amperage of the fuse; 11. Next to the fuse amperage is the position of that fuse on the plate; 12. The two circled letters represent the colour of the module port; 13. Next is the connection number; 14. This point indicates the node number; 15. At the end of the wire is the ground number.
Updated on 14 April 2026 by ScegliAuto
Video tutorial
Related tutorials
Dacia Sandero
(2012-2020 /
B8)
Before you begin, sit in the driver's seat of your Dacia Sandero Stepway. Start by repeatedly pressing the button located at the end of the right ind…

Dacia Sandero
(2012-2020 /
B8)
When the engine of your Dacia Sandero overheats abnormally even at low speeds, it is very likely that it is time to replace the appropriate air filte…

Dacia Sandero
(2008-2012 /
BS)
Below you will find the description of all the various steps you need to follow if you want to manually reset the service light of your Dacia Sandero…
Other guides you may be interested in
|
Frequently Asked QuestionsHow to reset the tyre pressure warning light on the Suzuki Jimny?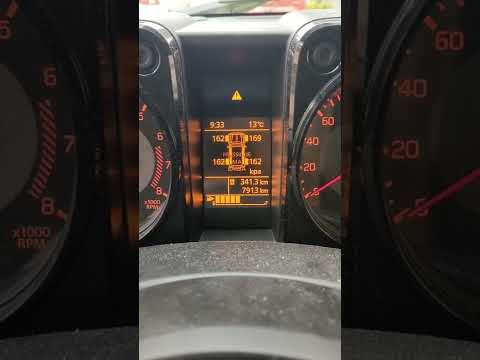
To reset the tyre pressure warning light on the Suzuki Jimny, first inflate the tyres to the pressure value indicated on the corresponding sticker: this is located at the bottom of the driver's door pillar. Once the tyres are inflated, insert the ignition key and turn on the instrument panel: select the screen that indicates the tyre pressures, checking that the values change. After a few seconds, the tyre pressure warning light will automatically turn off. by ScegliAuto More videos
|

For advertising on this site Write to info@scegliauto.com
ScegliAuto is not responsible for any inaccuracy of the data in the lists. To report any inaccuracy or your business (if you own the business in question), please write to info@scegliauto.com
Number of seconds to generate the page: 0.179
(c) ScegliAuto 2026 - info@scegliauto.com - Privacy policy VAT number: IT01247470535 |
