
|
Do it yourself
| |||
| ||||


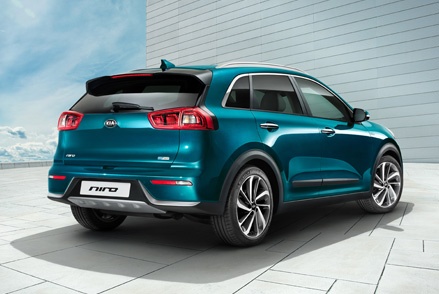
How to replace interior and number plate lights with LED lights on a Kia Niro
Model: Kia Niro
MK 1
- Years:
2016, 2017, 2018, 2019, 2020, 2021, 2022, 2023
Video tutorial
To replace the interior lights and number plate lights of the Kia Niro with LED ones, start with the number plate lights: unscrew the screw securing the plastic cover, turn it counterclockwise to remove the old W5W bulb and insert the LED one. Then turn it clockwise and re-screw the screw. For the front dome lights, insert the screwdriver at the sides of the cover and pop it out. The Festoon bulb can be removed by pulling it down. To reinstall it, insert it with slight pressure, ensuring the "tombstone" switch is facing upwards. For the courtesy lights on the sun visor, lever it out to remove the cover, then pull out the Festoon or W5W bulb: when inserting the new LED, apply pressure; if the pins touch the heatsink, gently separate them with the screwdriver to avoid short circuits. For the rear dome lights, proceed as for the front ones. For the boot lights, lever on the left side of the cover with a very small screwdriver to pop it out. The procedure is similar to that of the sun visors. Usually, for interior lights, an anti-error canbus resistor is not necessary, but it's always best to check, while it is required for number plate lights. If an LED bulb does not light up, remove it and reinstall it the opposite way (LEDs have polarity, unlike halogens).
Posted on 15 August 2026 by ScegliAuto
Related tutorials
Kia Niro
(2021-2026 /
SG2)
Replacing halogen lights with LED lights has never been easier, just a little patience is needed. First, turn off the car and open the hood, behind t…

Kia Niro
(2016-2023 /
MK 1)
Today's instructions will show you how to dismantle and replace the front headlamp bulbs on a Kia Niro. First, open the bonnet and start by removing …

Kia Niro
(2021-2026 /
SG2)
The Kia Niro Hybrid is equipped with various warning lights, including the tyre pressure warning light, represented by a deflated tyre with an exclam…
Other guides you may be interested in |
How to Remove the Rear Seat of a Hyundai Tucson?
To remove the rear seat of a Hyundai Tucson, follow these steps. Start by moving the front seats to their most forward position to gain space. Next, locate the release lever on the underside of the rear seat, near the floor. Press this lever down while pulling the seat upwards to unlock it from the anchor pins. Once unlocked, tilt the seat upwards and forwards to remove it from its position. Repeat this process for both sides of the rear seat. Be careful of any electrical cables or components that may be connected to the seat during removal. Once the rear seat is removed, the disassembly is complete. by ScegliAuto More videos
|
|
For advertising on this site Write to info@scegliauto.com
ScegliAuto is not responsible for any inaccuracy of the data in the lists. To report any inaccuracy or your business (if you own the business in question), please write to info@scegliauto.com
Number of seconds to generate the page: 0.106
(c) ScegliAuto 2026 - info@scegliauto.com - Privacy policy VAT number: IT01247470535 |
