
|
Do it yourself
| |||
| ||||


Instructions for Painting Brake Calipers
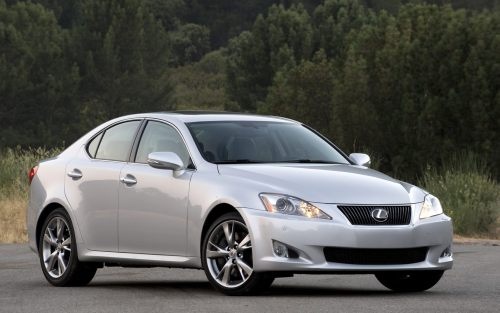
Model: Lexus IS
MK 2
- Years 2005-2013
If you want to give your car a sportier look, painting the brake calipers is certainly effective, generally opting for red or yellow, like high-performance cars. To carry out this painting, it is essential to clean the caliper and use a specific paint designed for the high temperatures to which the caliper is subjected. Proceed by placing the vehicle on suitable axle stands and removing the wheel; ideally, you would also remove the caliper and its bracket to clean and paint perfectly, but this would require bleeding the system afterwards. You can also proceed by thoroughly cleaning the caliper, masking the areas not to be painted with masking tape, and finally painting with a small brush to avoid smudging and to be as precise as possible.
Updated on 16 February 2026 by ScegliAuto
This video is currently unavailable
Related tutorials
Lexus IS
(2005-2013 /
MK 2)
To give the engine bay a more attractive appearance, consider painting the plastic covers to match the car or with an aluminium effect. It is essenti…
Lexus IS
(2013-2024 /
MK 3)
If you hear a squeal from the brake calipers during braking, especially at low speeds, inspect the braking system to determine whether to replace the…
Lexus IS
(2013-2024 /
MK 3)
If you notice signs of deterioration on the brake pipes or even cracks causing oil to leak, it is absolutely essential to replace these pipes. Lift t…
Other guides you may be interested in
|
How to Replace the Remote Battery for the Volvo XC40?
In this tutorial, you will see how to replace the battery in the remote for the Volvo XC40, a very simple and quick operation. For this, you will need a replacement battery of type CR2032 and possibly a small flathead screwdriver. First, remove the front cover by pressing the button on the metal ring, then locate the second button, press it as well, and remove the opposite cover. Next, open the circular cap, take out the old battery, and insert the new one in the opposite direction. Finally, reassemble everything. by ScegliAuto More videos
|
|
For advertising on this site Write to info@scegliauto.com
ScegliAuto is not responsible for any inaccuracy of the data in the lists. To report any inaccuracy or your business (if you own the business in question), please write to info@scegliauto.com
Number of seconds to generate the page: 0.448
(c) ScegliAuto 2026 - info@scegliauto.com - Privacy policy VAT number: IT01247470535 |
