
|
Do it yourself
| |||
| ||||


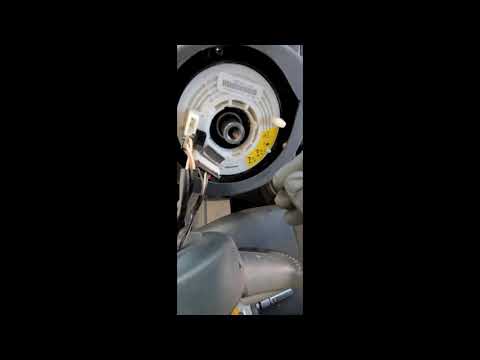
How to remove the airbag light in a 2013 Mini Cooper S.
Model: Mini Mini
R56, R57, R55
- Years 2007-2014
To remove the airbag warning light in a 2013 Mini Cooper S, it is important to proceed with caution, as the airbag system is a fundamental safety component. First of all, make sure to have an accurate diagnosis of the reason why the light is on. In many cases, the issue is related to a blown fuse, a faulty connection, or a sensor that is not working properly. The fuse box is located inside the passenger compartment, on the passenger side, under the dashboard. To access it, open the protective panel. If the light is related to a fuse, replacing it may solve the problem. If it persists, an electronic check through an OBD diagnosis is necessary to identify and correct any malfunctions. Do not attempt to fix it without the proper equipment, as the airbag system is delicate and safety could be compromised.
Posted on 10 April 2025 by ScegliAuto
Video tutorial
Related tutorials
Mini
(2001-2007 /
R52, R50, R53)
Today's instructions will show us how to disassemble and remove the steering wheel and its airbag from the Mini Cooper. First, we get into the car an…

Mini
(2007-2014 /
R56, R57, R55)
Today we will explain how to remove the airbag on a Mini Cooper R56 model vehicle. This operation is similar for many car models on the market; to re…
Mini
(2001-2007 /
R52, R50, R53)
Before we are able to start, we will have to disconnect the battery of our Mini Cooper, so as to work safely. We start by sitting in the driver's sea…
Other guides you may be interested in
|
How to Replace the Window Regulator on the BMW X3
Replacing the window regulator mechanism requires removing the door panel and the aluminum underpanel to access the mechanism itself. Remove the motor and loosen the glass retaining clips to complete the removal of the window regulator. Attach the motor to the new mechanism and insert the assembled unit back into the door, securing it with the appropriate nuts. Then, insert the glass and tighten the clips, completing the installation by connecting the motor's power connector and performing a functionality check before reassembling all other components. by ScegliAuto More videos
|

|
For advertising on this site Write to info@scegliauto.com
ScegliAuto is not responsible for any inaccuracy of the data in the lists. To report any inaccuracy or your business (if you own the business in question), please write to info@scegliauto.com
Number of seconds to generate the page: 0.134
(c) ScegliAuto 2026 - info@scegliauto.com - Privacy policy VAT number: IT01247470535 |