
|
Do it yourself
| |||
| ||||


How to Remove the Interior Light of a Mini
Model: Mini Mini
R52, R50, R53
- Years 2001-2007
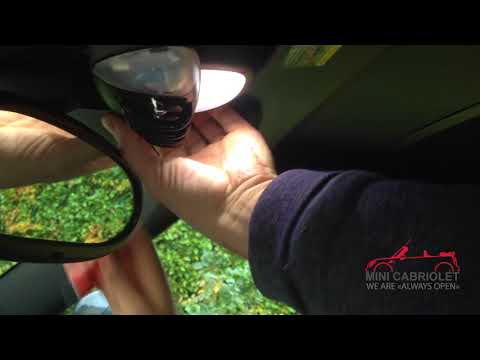
Remove the interior light of a Mini: use a screwdriver or plastic lever to pry between the cover and the light itself (avoid damaging the headlining), pull the cover out from the panel and disconnect the power connector after removing it. Replace the damaged bulb with a new one (same size and voltage). Refit the light into its housing (push it in with your hands until the metal clips are fully locked). Test the light's functionality before completely refitting the piece.
Updated on 5 March 2026 by ScegliAuto
Video tutorial
Related tutorials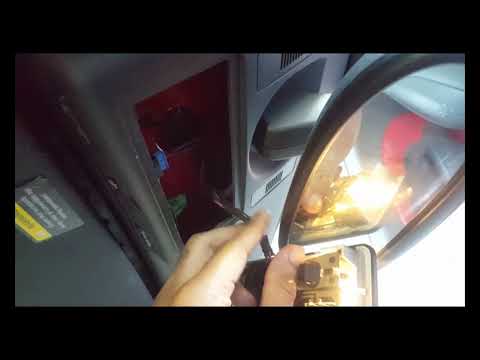
Mini
(2001-2007 /
R52, R50, R53)
Are the Mini's ceiling light bulbs burned out? Let's see how they change. With a screwdriver we pry between the ceiling light and the sky panel (with…

Mini
(2001-2007 /
R52, R50, R53)
Remove the burnt out light bulb from the ceiling light? We remove the bulb from inside the spotlight. We are going to pry between the cover of the ce…
Mini
(2007-2014 /
R56, R57, R55)
Learn how to remove the interior lights, specifically the dashboard light, on a Mini R55 (to replace the bulb). Use a screwdriver to lever between th…
Other guides you may be interested in |
How to Replace the Window Regulator on the BMW X3
Replacing the window regulator mechanism requires removing the door panel and the aluminum underpanel to access the mechanism itself. Remove the motor and loosen the glass retaining clips to complete the removal of the window regulator. Attach the motor to the new mechanism and insert the assembled unit back into the door, securing it with the appropriate nuts. Then, insert the glass and tighten the clips, completing the installation by connecting the motor's power connector and performing a functionality check before reassembling all other components. by ScegliAuto More videos
|
|
For advertising on this site Write to info@scegliauto.com
ScegliAuto is not responsible for any inaccuracy of the data in the lists. To report any inaccuracy or your business (if you own the business in question), please write to info@scegliauto.com
Number of seconds to generate the page: 0.047
(c) ScegliAuto 2026 - info@scegliauto.com - Privacy policy VAT number: IT01247470535 |