
|
Do it yourself
| |||
| ||||


Removing the Mini Cooper F56 plastic mudguards
Model: Mini Mini
F57, F56, F55, F54
- Years 2014-2023
Today we will see how to remove the plastic mudguards of a Mini Cooper F56. First of all, let's open the bonnet of our car: let's equip ourselves with a plastic lever and very delicately release our fascia, as shown in the video; It is important not to use other types of levers (made of hard material) which could damage the bodywork of your car. Once released from the internal clips we remove the screw that we find inside the mudguard, unscrewing it with a socket wrench; remove all the remaining screws and remove the plastic band!
Posted on 25 November 2020 by ScegliAuto
Video tutorial
Related tutorials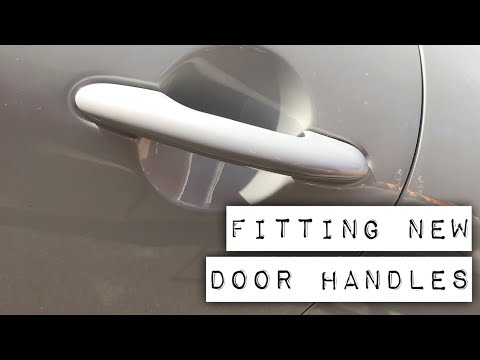
Mini
(2014-2023 /
F57, F56, F55, F54)
In this video tutorial we will see how to remove the door handle of a Mini Cooper F56, in simple steps. First of all we open the front door and we go…
Mini
(2014-2023 /
F57, F56, F55, F54)
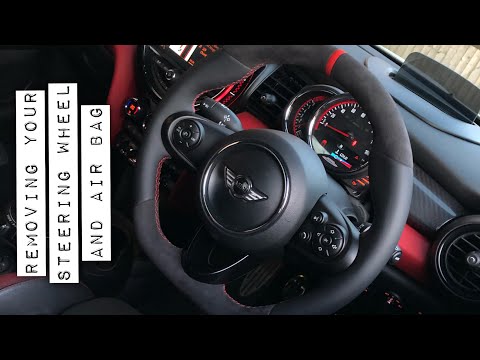
In this video tutorial we will see how to remove the steering wheel of a Mini Cooper F56, but also on other models of the manufacturer. First of all …
Mini
(2014-2023 /
F57, F56, F55, F54)
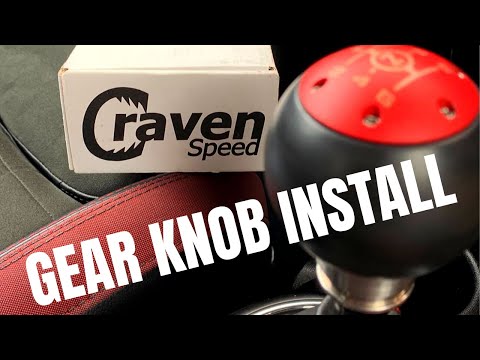
Let's find out in this short video how to remove and replace the gear knob on the Mini Cooper F56, in the JCW version, by following these simple step…
Other guides you may be interested in
|
Frequently Asked QuestionsHow to Remove the Stereo from a Hyundai i20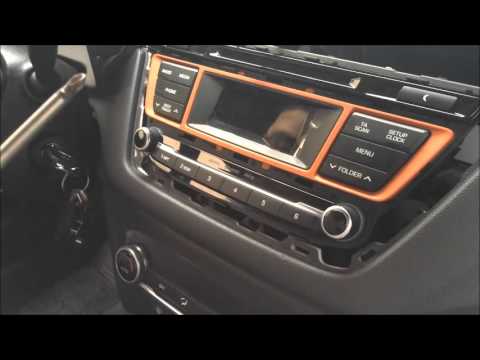
Want to remove the stereo from your Hyundai but don’t know how? In this video, see how to remove the original stereo from your car. First, remove the dashboard cover plastics using a plastic tool, then detach the central frame of the stereo (where the air vents are located) along with the related clips of the control buttons. Once the stereo is free from constraints, unscrew the fastening screws on its sides. Pull the stereo out by hand and disconnect the cables (power and antenna). To reassemble, proceed in reverse. by ScegliAuto More videos
|

|
For advertising on this site Write to info@scegliauto.com
ScegliAuto is not responsible for any inaccuracy of the data in the lists. To report any inaccuracy or your business (if you own the business in question), please write to info@scegliauto.com
Number of seconds to generate the page: 0.049
(c) ScegliAuto 2026 - info@scegliauto.com - Privacy policy VAT number: IT01247470535 |