
|
Do it yourself
| |||
| ||||


How to reset the brake pad wear warning light on the Mini Cooper
Model: Mini Mini
R52, R50, R53
- Years 2001-2007
Let's find out below the instructions that will allow us to reset the brake pad wear warning light of the Mini Cooper. First of all we get on board the car and keep the driver's side door open; then we turn on the instrument panel, turning the key to position two, and we go to press the brake pedal, as shown in the video. At this point we wait about a minute until the brake pad wear warning light goes out; then we start the engine, checking that the brake wear warning light has actually reset from the instrument panel!
Posted on 14 September 2022 by ScegliAuto
Video tutorial
Related tutorials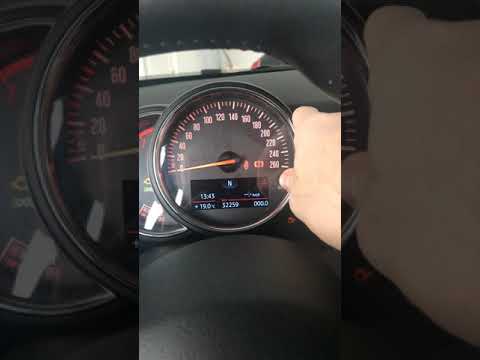
Mini
(2014-2023 /
F55, F54, F57, F56)
In this tutorial, we can see how to reset the brake pad warning light on a Mini Cooper F56 (2014-2023). To reset the brake pad warning light, first w…

Mini
(2001-2007 /
R52, R50, R53)
On the Mini Cooper R520, R52, and R53 versions, we have a warning light that indicates brake pad wear. It is certainly a very useful warning light, b…

Mini
(2014-2023 /
F55, F54, F57, F56)
Today's steps will show us how to reset the brake pad wear indicator light on the Mini Cooper; before performing this operation, it is necessary to h…
Other guides you may be interested in
|
Remove the Rear Light of a Nissan Qashqai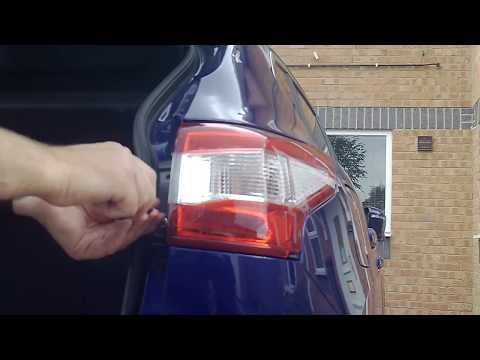
Remove the rear light of a Nissan Qashqai to replace the damaged bulbs. Open the boot lid, unscrew the securing bolts located at the side of the rear light using a screwdriver (or socket spanner), and once the light is free from any constraints, detach it from the bodywork (disconnect the relevant power connectors). Replace the damaged bulbs with equivalent size and voltage pieces (replace the light if damaged). Finally, refit the light, proceeding in reverse order with the assembly of the other parts. by ScegliAuto More videos
|
|
For advertising on this site Write to info@scegliauto.com
ScegliAuto is not responsible for any inaccuracy of the data in the lists. To report any inaccuracy or your business (if you own the business in question), please write to info@scegliauto.com
Number of seconds to generate the page: 0.114
(c) ScegliAuto 2026 - info@scegliauto.com - Privacy policy VAT number: IT01247470535 |