
|
Do it yourself
| |||
| ||||


How to Install a Wireless Charger on a Mini F Series
Model: Mini Mini
F56, F57, F54, F55
- Years 2014-2023
In this video, see how to install a wireless charger on a Mini F series: start by removing the trim around the cigarette lighter using a plastic spatula. Remove the USB connector located underneath and follow the cable to the 12V socket; once located, press the front of the connector to release the power supply, pulling it out of the opening; then remove the existing input socket. Connect the wireless charging port using the appropriate male/female connectors, then attach the small power cable; remove the alignment clips of the existing socket to insert those for the new device. Connect the data cable to the input port, and position the wireless mat: perform a test with the engine running to check that the device works. When fitting the panel, ensure all cables are correctly mounted. The result is a perfect integration with the car's console. You can find this device on scpautomotive.co.uk by searching for Mini-f-series-centre-console-wireless-charger. The price is not cheap, costing £187.95 plus delivery charges, calculated at checkout, but considering the result, it may be worth it.
Updated on 6 September 2026 by ScegliAuto
Video tutorial
Related tutorials
Mini
(2014-2023 /
F56, F57, F54, F55)
Like all cars, the Mini Cooper also has its maintenance program, detailed in the user manual. The oil change and oil filter replacement are essential…

Mini
(2010-2016 /
Countryman1, R60)
In this video we can see how easy it is to install the original Mini air freshener on our Mini Countryman R60. This is an accessory that we can find …

Mini
(2007-2014 /
R56, R55, R57)
In this tutorial, see how to install an armrest in the Mini Cooper, a very simple operation. First, remove the rear storage compartment, then take ou…
Other guides you may be interested in
|
Frequently Asked QuestionsHow to reset the tyre pressure warning light on the Suzuki Jimny?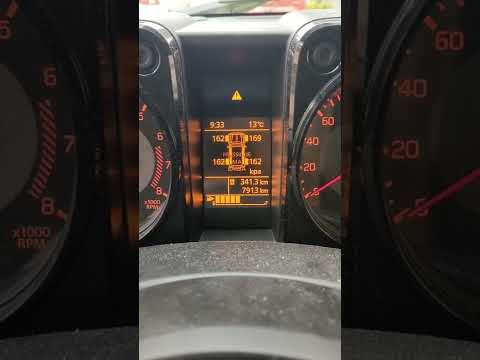
To reset the tyre pressure warning light on the Suzuki Jimny, first inflate the tyres to the pressure value indicated on the corresponding sticker: this is located at the bottom of the driver's door pillar. Once the tyres are inflated, insert the ignition key and turn on the instrument panel: select the screen that indicates the tyre pressures, checking that the values change. After a few seconds, the tyre pressure warning light will automatically turn off. by ScegliAuto More videos
|

|
For advertising on this site Write to info@scegliauto.com
ScegliAuto is not responsible for any inaccuracy of the data in the lists. To report any inaccuracy or your business (if you own the business in question), please write to info@scegliauto.com
Number of seconds to generate the page: 0.059
(c) ScegliAuto 2026 - info@scegliauto.com - Privacy policy VAT number: IT01247470535 |
