
|
Do it yourself
| |||
| ||||


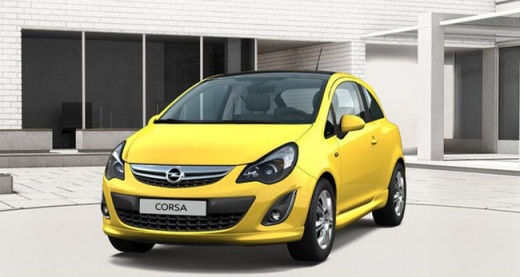
How to replace the front headlight bulb of an Opel Corsa?
Model: Vauxhall Corsa
Corsa D
- Years:
2006, 2007, 2008, 2009, 2010, 2011, 2012, 2013, 2014
Video tutorial
To replace the headlight bulb of an Opel Corsa, the first step is to remove the entire headlight. Open the vehicle's hood using the release lever inside the cabin. Once the hood is open, locate the headlight mounting screws, which are usually located around the top and side of the headlight. Remove the screws with a suitable screwdriver and be careful not to damage the clips or plastic supports that hold the headlight in place. After removing the screws, gently pull the headlight outwards, being careful of the electrical connections that power it. Once the headlight is removed, disconnect the electrical connector to handle the headlight more easily. Now access the back of the headlight where the bulb cover is located. Remove the cover and replace the burnt-out bulb with a new one, being careful not to touch the glass part of the bulb with your fingers. After inserting the new bulb, reposition the headlight and reconnect the cables, then secure everything back in place with the screws.
Posted on 14 April 2025 by ScegliAuto
Related tutorials
Vauxhall Corsa
(2006-2014 /
Corsa D)
If you own an Opel Corsa D and need to replace one of the front headlight bulbs yourself, simply read the following guide carefully and apply all the…

Vauxhall Corsa
(2000-2006 /
Corsa C)
In this new mini guide dedicated to all of you who own an Opel Corsa C, we will explain the steps you need to take if you intend to replace the front…

Vauxhall Corsa
(2014-2019 /
Corsa E)
If one of the bulbs of the front headlight of your Opel Corsa E (2015) suddenly stops working, you must replace it as soon as possible with a new one…
Other guides you may be interested in
|
How to Open the Bonnet on the Mitsubishi L200?
In this tutorial, you will see how to open the bonnet on the Mitsubishi L200, a very simple operation that follows the standard procedure. First, open the vehicle and go to the driver's side, then locate the lever at the lower outer area, just in front of the pedals, and pull it. Next, position yourself in front of the bonnet, locate the second lever above the Mitsubishi logo, and push it to the right, releasing the latch. At this point, you can fully lift the bonnet and secure it with the prop rod. by ScegliAuto More videos
|
|
For advertising on this site Write to info@scegliauto.com
ScegliAuto is not responsible for any inaccuracy of the data in the lists. To report any inaccuracy or your business (if you own the business in question), please write to info@scegliauto.com
Number of seconds to generate the page: 0.095
(c) ScegliAuto 2026 - info@scegliauto.com - Privacy policy VAT number: IT01247470535 |
