
|
Do it yourself
| |||
| ||||


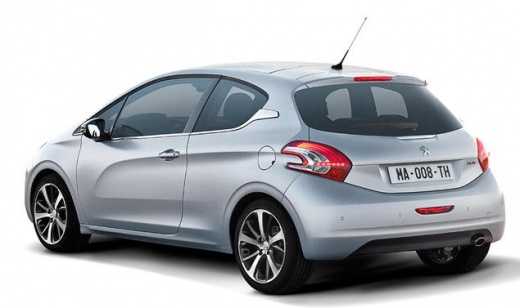
Repair of the electric window switch cover of the Peugeot 208.
Model: Peugeot 208
MK 1, A9
- Years:
2012, 2013, 2014, 2015, 2016, 2017, 2018, 2019
Video tutorial
In this video, we see how to repair the switch cover of the Peugeot 208: in this case, the glass on the passenger side would not open; it was only possible to operate it from the driver's side, which was quite inconvenient. The YouTuber did not purchase a new switch panel (the single button does not exist as a replacement) but instead fixed the damaged one by making a small hole in the switch cover and inserting a paperclip inside, which worked, but the button was quite loose. To fix this, he inserted spacers on the sides of the track so that the button would remain as stable as possible. It was a bit laborious, but it worked.
Posted on 6 December 2024 by ScegliAuto
Related tutorials
Peugeot 208
(2012-2019 /
MK 1, A9)
If the electric window lifters on your Peugeot 208 have suddenly stopped working, first check the status of the respective fuses, whose location is i…

Peugeot 208
(2012-2019 /
MK 1, A9)
Follow the steps below to remove and replace the door panel, both front and rear, of the Peugeot 208. First, open the front door and begin by removin…

Peugeot 208
(2012-2019 /
MK 1, A9)
In this short guide, we will see the information that will allow us to disassemble the front door panel and the side window of the Peugeot 208. First…
Other guides you may be interested in |
Where to Find and How to Remove the Spare Wheel of a Peugeot 5008?
The spare wheel of a Peugeot 5008 is located under the rear of the vehicle. To remove it, you need to lift the third row of seats to access the fixing bolt that holds the spare wheel in position. Using the correct spanner, proceed to unscrew the fixing bolt until the wheel is no longer secured. At this point, you can extract the spare wheel from underneath the vehicle. Once you have completed this step, you are free to fit the spare wheel. Ensure you correctly remount the spare wheel and securely tighten the fixing bolt when you are finished. by ScegliAuto More videos
|
|
For advertising on this site Write to info@scegliauto.com
ScegliAuto is not responsible for any inaccuracy of the data in the lists. To report any inaccuracy or your business (if you own the business in question), please write to info@scegliauto.com
Number of seconds to generate the page: 0.017
(c) ScegliAuto 2026 - info@scegliauto.com - Privacy policy VAT number: IT01247470535 |
