
|
Do it yourself
| |||
| ||||


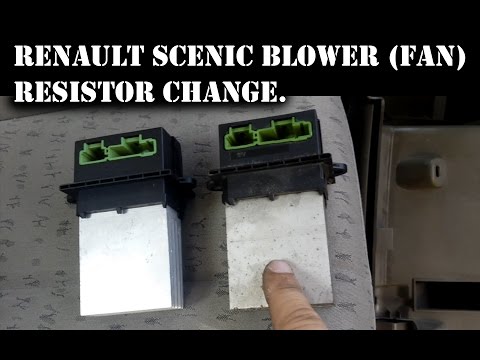
How to replace the heating resistor on Renault Scenic 2
Model: Renault Scenic
MK 2, Scenic 2
- Years 2003-2009
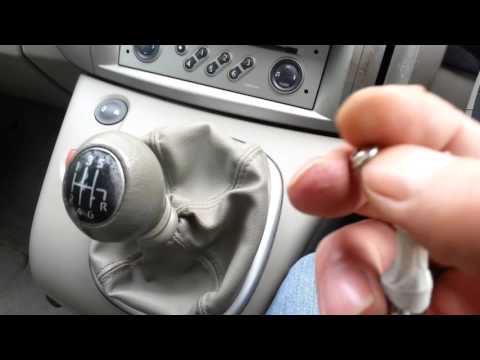
In this video tutorial you can see how it is possible to replace the heating resistance of the Renault Scenic second series. First you have to remove the gearbox cover and its lower panel, as the two screws are fixed underneath. Then remove the gear knob stud and slide off the cover. Once the cover has been removed, you have to unscrew the torx screws. Now you have to remove the bottom panel, then unhook the plastic clips that are on both sides; now you have to remove the plastic plate to unscrew another screw. Now also remove the other screw next to the gear that holds the whole block. Now lift the panel where there is the climate and also remove the hidden screw. Now you have to remove the drawer, which must be opened and removed the four screws. Now you have to remove the plastic on the side of the airbag and remove the hidden screw. Once the glove compartment has been removed, you will find the resistance to be replaced.
Posted on 26 March 2022 by ScegliAuto
Video tutorial
Related tutorials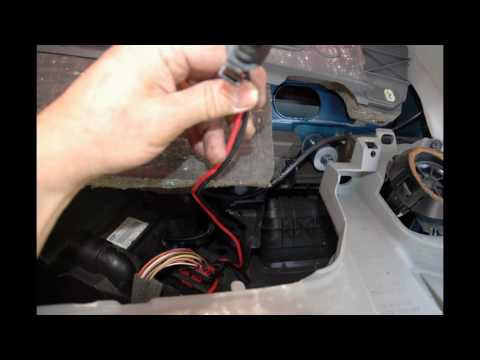
Renault Scenic
(1996-2003 /
)
How to replace the fan resistor on a Renault Scenic. In this video, learn how to perform the disassembly: use a lever to remove the plastic under the…
Renault Scenic
(2003-2009 /
MK 2, Scenic 2)
Replacing the fan resistor on Renault Scenic? Let's see the disassembly of the piece. Remove the plastic placed above the dashboard (instrument panel…
Renault Scenic
(2003-2009 /
MK 2, Scenic 2)
How to replace the fan resistor on a Renault Scenic? Let's see how to carry out the disassembly. Remove the plastic cover above the centre tunnel usi…
Other guides you may be interested in
|
How to Remove the Centre Console on a Renault Scenic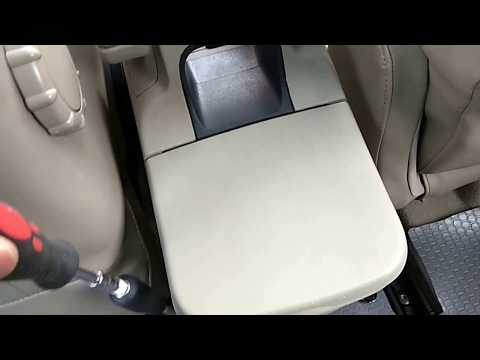
Watch this video to learn how to remove the glove compartment from the rear cover of the centre console on a Renault Scenic. Use a plastic lever to pry at the edge of the side plastics as shown in the video. Once the plastics are removed, unscrew the screws located at the sides of the centre console with a suitable screwdriver, and disconnect all the power connectors. Remove the side rests from the glove compartment. Fit the new piece onto the centre cover and proceed with the assembly of the remaining parts, working in reverse order. by ScegliAuto More videos
|
|
For advertising on this site Write to info@scegliauto.com
ScegliAuto is not responsible for any inaccuracy of the data in the lists. To report any inaccuracy or your business (if you own the business in question), please write to info@scegliauto.com
Number of seconds to generate the page: 0.061
(c) ScegliAuto 2026 - info@scegliauto.com - Privacy policy VAT number: IT01247470535 |