
|
Do it yourself
| |||
| ||||


Renault Megane - Video tutorial
Model: Renault Megane
Megane 1
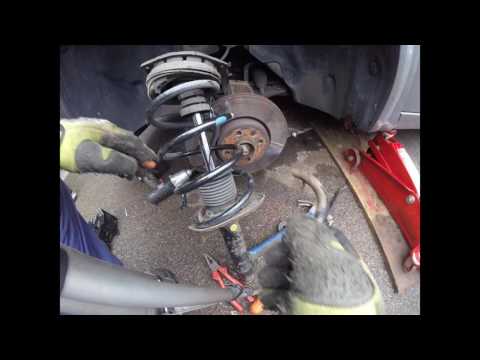
- Years 1995-2003 It should be noted immediately that the replacement of the front shock absorbers requires specific equipment such as clamps to compact the springs. Having said that, lift the car on suitable car stands (better if you can have a bridge) and remove the front wheel; remove the cable guide bracket and then the pins fixing the shock absorber to the wheel hub by extracting them and releasing the shock absorber; access the engine compartment to remove the fixing pins of the shock absorber support to the frame dome and then extract the shock absorber from its seat. Then apply the clamps to the spring to be able to compact it, remove the upper support from the old shock absorber and remove the rubber bellows; insert the bellows and the spring on the new shock absorber, apply the support and release the spring by loosening the clamps. Then proceed backwards to install the new shock absorber on the car, first fixing it to the dome and then to the hub.
Posted on 11 August 2023 by ScegliAuto
 Renault Megane front shock absorber replacement
Renault Megane (2002-2010 / Megane 2) Do we want to replace the front shock absorber of the Renault Megane? Let's see how the front shock absorber of the car is removed. We lift the front 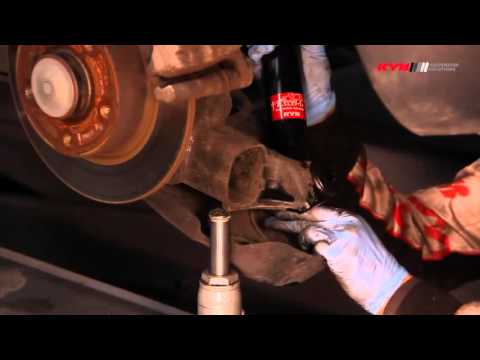 Rear shock absorber replacement
Renault Megane (2008-2015 / Megane III, Megane 3) Replacing the rear shock absorber is generally easier than the front one as the spring and damper are separate; then lift the car and remove the plas 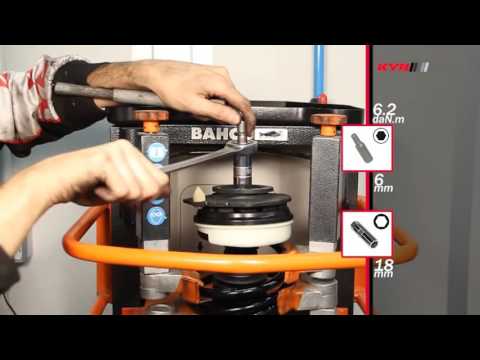 Replacement of front shock absorbers
Renault Megane (2002-2010 / Megane 2) Replacing the front shock absorbers on this model of car will require quite a bit of work as you will have to disassemble many elements: start by lif Other guides that may interest you
|
How do I replace the Land Rover Evoque auxiliary battery?
In order to replace the auxiliary battery of the Land Rover Evoque, it is necessary to go inside the passenger compartment and remove the panel which is positioned immediately under the glovebox. Once the screws that secure this panel have been loosened, it will be possible to access the components located in its rear part, including the auxiliary battery. The latter must be disconnected from its cables and the fixing screws must be loosened. The battery can then be replaced with a new one and the panel can be fixed again with its screws. by ScegliAuto More videos
|
|
For advertising on this site Write to info@scegliauto.com
ScegliAuto is not responsible for any inaccuracy of the data in the lists. To report any inaccuracy or your business (if you own the business in question), please write to info@scegliauto.com
Number of seconds to generate the page: 0.043
(c) ScegliAuto 2024 - info@scegliauto.com - Privacy Policy VAT number: IT01247470535 |