
|
Do it yourself
| |||
| ||||


Replacing the Cylinder Head Gasket
Model: Renault Clio
Clio 3, MK 3, Clio III
- Years 2005-2013
Synchronising or timing an engine means ensuring that there is synchronisation between the positions of the valves (intake and exhaust) and those of the pistons, that is, between the crankshaft and the camshaft: for this reason, all manufacturers include references (arrows, notches, pin holes) that indicate the correct alignment between these elements. Failure to synchronise would result in a collision between the valves and the pistons, causing severe engine damage. The flatness of the surfaces of the cylinder head and the cylinder block is crucial to ensure that during normal engine operation, there are no interferences between pistons and valves (this is why different thicknesses of gaskets exist to compensate for any machining); it is always advisable to use a new set of bolts to secure the head and to follow a tightening sequence from the centre outwards; once the camshafts and the rocker cover are installed, align the timing references (use the appropriate tools to prevent movement of the shafts during the installation of the timing belt), install the pulleys and then the timing belt using a new kit that also includes the water pump and the tensioner. Remove the tools and turn the crankshaft twice to complete a cycle and check the alignment of the timing references again.
Updated on 14 February 2026 by ScegliAuto
Video tutorial
Related tutorials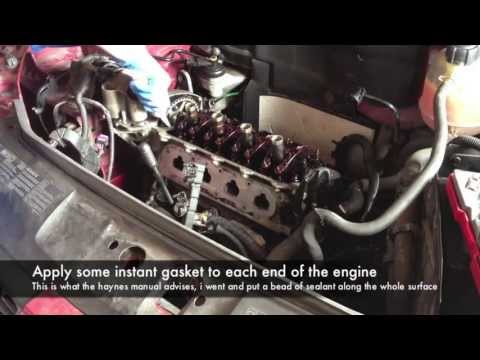
Renault Clio
(1998-2005 /
MK 2, Clio 2)
Disconnect all hoses from the engine cover, including the air intake ducts. Unscrew the bolts that secure the cover to the valve cover and remove it.…
Renault Clio
(1998-2005 /
MK 2, Clio 2)
Remove the spark plugs from above the cylinder head of a Clio? Let's see how they disassemble from inside the engine compartment. We pull the engine …
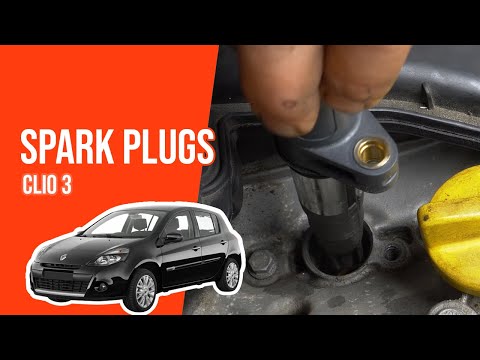
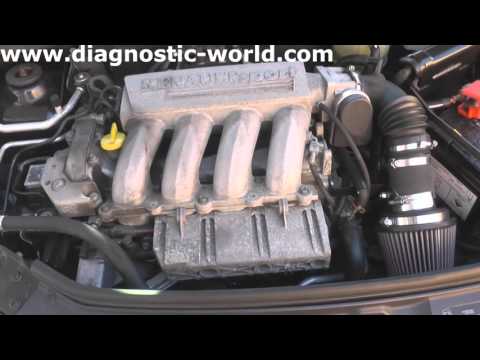
Renault Clio
(2005-2013 /
Clio 3, MK 3, Clio III)
Are you having trouble starting the car? Let’s see how to replace the spark plugs on the Clio. Release the engine compartment opening lever located a…
Other guides you may be interested in
|
How to Remove the Headlight Bulbs on a Toyota Rav4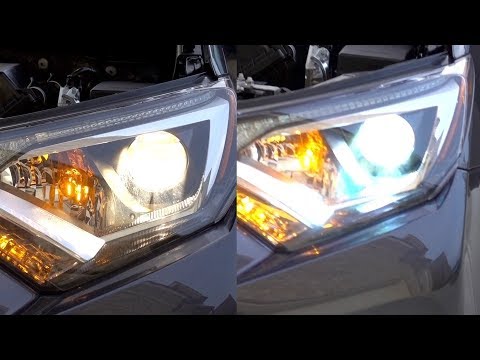
Let's see how to remove the headlight bulbs on a Toyota Rav4. Open the bonnet by pulling the lever located at the bottom right of the dashboard and secure it. Locate the inspection cap (if present) on the headlight and remove it (located at the rear of the headlight). At this point, you will find the bulbs with metal clips; pull the bulb holders out of the headlight and extract the damaged bulb using a screwdriver and pliers. Fit the new bulb (ensuring it is the correct type and size), insert the bulb holder back into the headlight housing, and close the headlight with the inspection cap. Test the lights to ensure they are functioning correctly. by ScegliAuto More videos
|

|
For advertising on this site Write to info@scegliauto.com
ScegliAuto is not responsible for any inaccuracy of the data in the lists. To report any inaccuracy or your business (if you own the business in question), please write to info@scegliauto.com
Number of seconds to generate the page: 0.076
(c) ScegliAuto 2026 - info@scegliauto.com - Privacy policy VAT number: IT01247470535 |