
|
Do it yourself
| |||
| ||||


Replacement of Cabin Pollen Filter
Model: Renault Scenic
- Years 1996-2003
Locate the cabin pollen filter, which is situated beneath the glove compartment. Remove the foam protection from the filter housing. Unscrew the two bolts securing the plastic cover of the filter housing. Remove the cover and extract the old filter by pulling it downwards. Take the new filter and insert it in the same position as the old one. Reposition the cover and its protection. Screw in the two bolts that secure it in place. This maintenance operation is performed on a Renault Scenic.
Updated on 19 February 2026 by ScegliAuto
Video tutorial
Related tutorials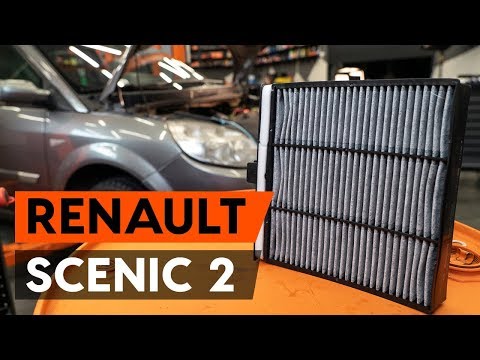
Renault Scenic
(2003-2009 /
Scenic 2, MK 2)
In this video tutorial, we can see how to replace the pollen filter on a Renault Scenic, following a few simple steps: the first thing to do is to pu…
Renault Scenic
(2003-2009 /
Scenic 2, MK 2)
Obtain a pollen filter of the same model identical to the original. The pollen filter purifies the air in the cabin and is located in the engine comp…
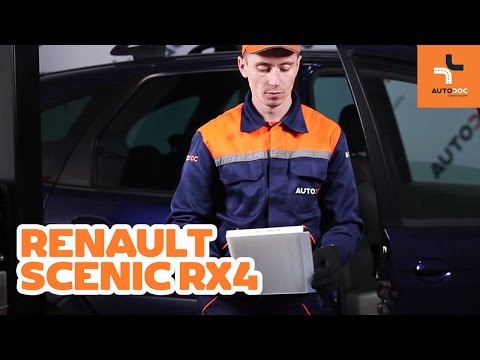
Renault Scenic
(1993-2003 /
MK 1, Scenic 1, RX4)
In this video tutorial we can see how to replace the pollen filter in a Renault Scenic RX4, following some simple steps: the first thing to do is to …
Other guides you may be interested in
|
Removing and Replacing a Front Headlamp of a Lancia Lybra
This video explains how to remove and replace the front headlamp and its bulbs on a Lancia Lybra. The car has a very simple and quick headlamp removal system. To start, lift the bonnet, reach into the engine bay, and (specifically at the rear of the headlamp) unclip the metal tab that secures the headlamp, then use a screwdriver to undo the few Torx screws. After removing the screws, unclip the headlamp and pull it out from the bumper, disconnect the power connectors, and replace any damaged bulbs or the entire unit. The reassembly phase is very straightforward: insert the headlamp into the bumper housing as shown in the video, secure the metal tab until the headlamp clicks into place (screw in the securing screws). Finally, test the correct operation of the lights. by ScegliAuto More videos
|
|
For advertising on this site Write to info@scegliauto.com
ScegliAuto is not responsible for any inaccuracy of the data in the lists. To report any inaccuracy or your business (if you own the business in question), please write to info@scegliauto.com
Number of seconds to generate the page: 0.049
(c) ScegliAuto 2026 - info@scegliauto.com - Privacy policy VAT number: IT01247470535 |