
|
Do it yourself
| |||
| ||||


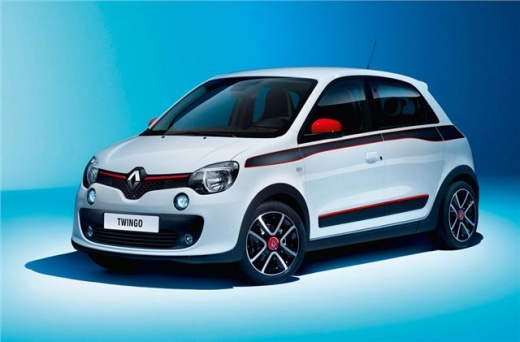
How the Automatic Air Conditioning Works on the Renault Twingo Electric
Model: Renault Twingo
Twingo 3, Twingo III
- Years:
2014, 2015, 2016, 2017, 2018, 2019, 2020, 2021, 2022, 2023, 2024
Video tutorial
In this video, you can see how the controls for the automatic air conditioning on the Renault Twingo Electric work: the advantage is that you can turn it on even when the vehicle is off, as it operates with a heat pump, unlike vehicles with an internal combustion engine. So, turn on the ignition, press the automatic button, and it starts immediately, selecting the temperature. Pressing the "eco" button also reduces the car's consumption, as well as that of the air conditioning, to save energy. If you press one of the buttons on the right, the air conditioning switches to "manual" mode, meaning you are adjusting it according to your specific needs; turning off the manual buttons returns it to the last automatic setting. If the vehicle is plugged in for charging, you can schedule the air conditioning to turn on, either for heating or cooling, and you need to do this from the multimedia screen. Select "electric vehicle", then "climate control"/"schedule"/"edit" and here modify all the parameters according to your needs; you can also do this from the app.
Updated on 30 August 2026 by ScegliAuto
Related tutorials
Renault Twingo
(2007-2014 /
Twingo 2)
The fuse box for the cabin is located inside the glove compartment on the Renault Twingo. Here you will find, for example, the fuse that controls the…

Renault Twingo
(1993-2007 /
Twingo 1)
The attached video shows the complete fuse diagram for the first series Renault Twingo. Fuses are electronic devices that protect the electrical syst…

Renault Twingo
(2007-2014 /
Twingo 2)
In this video we can see how to repair the horn of a Renault Twingo II: the horn of this car is operated from the satellite located on the turn signa…
Other guides you may be interested in
|
Replacing the Rear Light and Bulbs on the Opel Mokka
Today's instructions will show you how to remove and replace the rear light and its bulbs on the Opel Mokka. First, open the boot lid and start removing the side plastic cover; then, unscrew the fixing screws of the light and disconnect the electrical connector of the bulbs to remove it, as shown in the video. At this point, separate the bulb holder from the housing if you want to replace the bulbs of the light; then install the rear light, applying the reverse procedure of disassembly! by ScegliAuto More videos
|
|
For advertising on this site Write to info@scegliauto.com
ScegliAuto is not responsible for any inaccuracy of the data in the lists. To report any inaccuracy or your business (if you own the business in question), please write to info@scegliauto.com
Number of seconds to generate the page: 0.028
(c) ScegliAuto 2026 - info@scegliauto.com - Privacy policy VAT number: IT01247470535 |
