
|
Do it yourself
| |||
| ||||


How to Fix a Cabin Fan That Won't Start in a Smart?
Model: Smart Smart
453
- Years 2014-2022
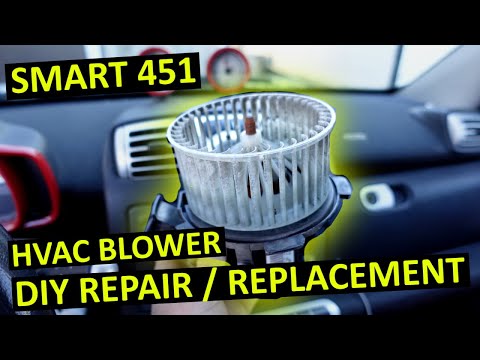
It may happen that the cabin fan does not work and therefore does not start. Let’s see what to do and how to replace or clean it in a Smart. First, note that the cost of the part, excluding labour if you do it yourself, will be around a hundred pounds. As this is an important aspect of the car, it should not be underestimated, and if you encounter difficulties during replacement, to avoid causing further damage, always consult your trusted mechanic. First, disconnect the connector. You will notice that the fan is secured by a screw that needs to be removed with the appropriate screwdriver. Once removed, the operation will be very simple, as you will only need to turn it to the left. At this point, the fan is ready to be cleaned or replaced if cleaning does not suffice.
Updated on 12 April 2026 by ScegliAuto
Video tutorial
Related tutorials
Smart
(2007-2015 /
451)
In this guide, we will discover the main instructions that will allow us to dismantle and replace the cabin fan in a Smart Fortwo. First, open the fr…

Smart
(2007-2015 /
451)
In this video we see how to solve the problem of the key that is stuck in the ignition lock of the Smart Fortwo and cannot move or come out. The only…
Smart
(2007-2015 /
451)
To replace the cabin fan of the Smart, you need to completely detach the panel located at the bottom of the dashboard on the passenger side. Once the…
Other guides you may be interested in |
Frequently Asked QuestionsHow to Replace the Remote Battery for the Volvo XC40?
In this tutorial, you will see how to replace the battery in the remote for the Volvo XC40, a very simple and quick operation. For this, you will need a replacement battery of type CR2032 and possibly a small flathead screwdriver. First, remove the front cover by pressing the button on the metal ring, then locate the second button, press it as well, and remove the opposite cover. Next, open the circular cap, take out the old battery, and insert the new one in the opposite direction. Finally, reassemble everything. by ScegliAuto More videos
|
|
For advertising on this site Write to info@scegliauto.com
ScegliAuto is not responsible for any inaccuracy of the data in the lists. To report any inaccuracy or your business (if you own the business in question), please write to info@scegliauto.com
Number of seconds to generate the page: 0.229
(c) ScegliAuto 2026 - info@scegliauto.com - Privacy policy VAT number: IT01247470535 |
