
|
Do it yourself
| |||
| ||||


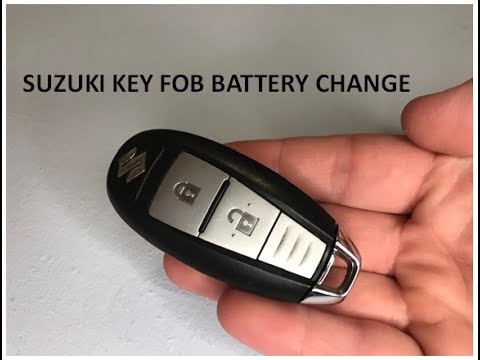
How to replace the battery of a Suzuki Baleno key?
Model: Suzuki Baleno
MK 2
- Years 2015-2026
To replace the battery of your Suzuki Baleno key, first take the key and identify the small groove or slot located along the edge of it, which allows you to open the shell in two parts. Using a thin and sturdy object, such as a small flathead screwdriver, gently insert it into the slot and carefully pry apart the two halves of the key to avoid damaging the plastic. Once opened, you will notice the battery, usually a button type, positioned inside the key. Carefully remove the old battery, paying attention to the polarity, that is, the position of the positive and negative poles, to avoid problems once the new battery is installed. Take the new replacement battery, making sure it is the correct type, and insert it in the same orientation as the previous one. Finally, carefully reassemble the key, aligning the two halves of the shell and pressing until you hear a click confirming that it is securely closed. Test the key to ensure that the new battery works properly and that the buttons respond without any issues.
Posted on 2 November 2024 by ScegliAuto
Video tutorial
Related tutorials
Suzuki Baleno
(2015-2026 /
MK 2)
In today's video guide, we see the procedure for replacing the battery (CR2032) of the key of a second-generation Suzuki Baleno. Well, first of all, …

Suzuki Baleno
(2015-2026 /
MK 2)
As we can see in this tutorial, replacing the remote control battery of the Suzuki Baleno is an extremely simple and economical operation. To do this…
Suzuki Baleno
(2015-2026 /
MK 2)
Fortunately, replacing the button battery inside the key of your Suzuki Baleno is one of the simplest and fastest operations that you can carry out i…
Other guides you may be interested in
|
Installation of Upgraded Intercooler Radiator with Pipes
Lift the vehicle on suitable axle stands, remove the front wheels, and then the front bumper and grille. Proceed to remove the front headlights; drain the coolant, remove the intercooler radiator and the hoses connecting it to the intake system. Position the new intercooler radiator in the grille, temporarily securing it with cable ties, and mark with a marker the part of the metal that needs to be removed to allow the new hoses to pass through. Cut the marked portion of metal and apply a gasket to the edge. Remove the inner cover of the bumper and position it near the radiator to identify any interfering parts to eliminate: again, apply a gasket to the edge of the cut. Create brackets for securing the new radiator and proceed with the installation of the connecting pipes from the radiator to the intake, shaping and connecting them appropriately. Finally, reassemble the bumper, headlights, and grille. by ScegliAuto More videos
|

|
For advertising on this site Write to info@scegliauto.com
ScegliAuto is not responsible for any inaccuracy of the data in the lists. To report any inaccuracy or your business (if you own the business in question), please write to info@scegliauto.com
Number of seconds to generate the page: 0.125
(c) ScegliAuto 2026 - info@scegliauto.com - Privacy policy VAT number: IT01247470535 |