
|
Do it yourself
| |||
| ||||


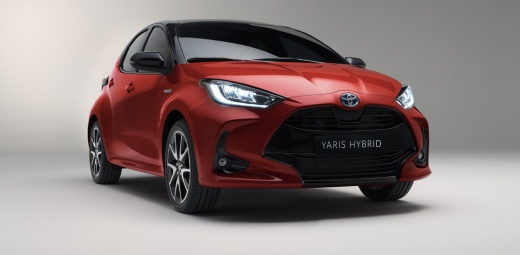
How to Remove the Cabin Bulb from a Toyota Yaris
Model: Toyota Yaris
MK 4
- Years:
2020, 2021, 2022, 2023, 2024, 2025, 2026
Video tutorial
Before starting, sit in the driver's seat of your Toyota Yaris. Begin by unclipping and removing the upper cabin light unit by simply pulling it towards you. This will give you access to the blown bulb. Next, unclip and remove the blown bulb from its housing. Once you have completed this step, you will have successfully disassembled it. To fit the new bulb and reassemble the cabin light unit, simply follow this brief procedure in reverse, and you will be done.
Updated on 8 April 2026 by ScegliAuto
Related tutorials
Toyota Yaris
(1999-2005 /
Xp10)
In this short video, you will see how to remove and replace the interior light bulb of the cabin light in the Toyota Yaris XP 10, first generation. F…

Toyota Yaris
(1999-2005 /
Xp10)
This brief and simple guide outlines the steps to remove and replace the bulb in the interior dome light of a Toyota Yaris. First, get inside the veh…

Toyota Yaris
(2020-2026 /
MK 4)
First, switch off the ceiling lights located in the centre of the cabin to prevent overheating. Next, remove the plastic cover that conceals the bulb…
ScegliAuto offers an extensive international collection of automotive tutorials available in 12 languages. Each guide combines instructional videos with original explanations written by experienced human editors, along with information about the car models covered.
Other guides you may be interested in
|
Guide to replacing the 12V battery on the Toyota Yaris Cross
Today, we will go through the main instructions to remove and replace the 12V battery on the Toyota Yaris Cross. First, open the right rear door of the vehicle and start by removing the plastic cover located under the seat in the corner. You will find the battery inside, where you will disconnect both battery terminals (positive and negative), as shown in the video. Now, remove and replace the battery with a new one of the correct type and the same amperage; then, reinstall the battery and finally the plastic cover. by ScegliAuto More videos
|
For advertising on this site Write to info@scegliauto.com
ScegliAuto is not responsible for any inaccuracy of the data in the lists. To report any inaccuracy or your business (if you own the business in question), please write to info@scegliauto.com
Number of seconds to generate the page: 0.016
(c) ScegliAuto 2026 - info@scegliauto.com - Privacy policy - About us VAT number: IT01247470535 |
