
|
Do it yourself
| |||
| ||||


How to Test and Clean the AdBlue Injector
Model: (Various brands) Various
Video tutorial
To test the AdBlue injector, you will need a 5/10 Volt power supply, connection cables, a rubber tube, and a multimeter. You can perform a bench test by connecting two cables to the injector connector and applying at least 5 Volts. You should hear a metallic click when the solenoid opens and closes. If you have a scan tool with bidirectional communication, you can control the opening/closing directly from the vehicle. Keep the injector powered (valve open); blow into the rubber tube; if air or water comes out of the nozzles, the injector is functioning. To dissolve AdBlue crystals, use hot water: pour it onto the injector head and power it while the water acts. During the test, water should start dripping from the tube. If the nozzles spray water evenly, the cleaning has been successful. In the video, during the resistance test with the multimeter, unstable resistances were found on the old injector, while the new ones showed a constant 13 Ohms. The cause could be that the injector was stuck open, and the variable resistance indicates a coil failure.
Posted on 22 September 2026 by ScegliAuto
Related tutorials
(Various brands) Various
In this video, we learn something very useful: how to clean our fuel injectors. You will need a solvent, such as white spirit, an air compressor or a…

(Various brands) Various
In this video, you will see how to clean the AdBlue injectors on VAG group vehicles. Specifically, this is a Volkswagen Sharan, but the procedure is …
(Various brands) Various
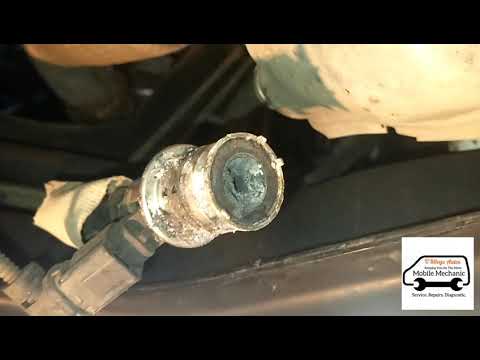
The video refers to a French car from the PSA group. The mechanic accessed the injector, which was completely clogged. He removed it and soaked it fo…
Other guides you may be interested in
|
How to Remove the Rear Seat of a Hyundai Tucson?
To remove the rear seat of a Hyundai Tucson, follow these steps. Start by moving the front seats to their most forward position to gain space. Next, locate the release lever on the underside of the rear seat, near the floor. Press this lever down while pulling the seat upwards to unlock it from the anchor pins. Once unlocked, tilt the seat upwards and forwards to remove it from its position. Repeat this process for both sides of the rear seat. Be careful of any electrical cables or components that may be connected to the seat during removal. Once the rear seat is removed, the disassembly is complete. by ScegliAuto More videos
|
|
For advertising on this site Write to info@scegliauto.com
ScegliAuto is not responsible for any inaccuracy of the data in the lists. To report any inaccuracy or your business (if you own the business in question), please write to info@scegliauto.com
Number of seconds to generate the page: 0.060
(c) ScegliAuto 2026 - info@scegliauto.com - Privacy policy VAT number: IT01247470535 |
