
|
Do it yourself
| |||
| ||||


Volkswagen Jetta - Video tutorial
Model: Volkswagen Jetta
A4, MK 4
- Years 1998-2005 Headlights are essential devices for driving safety. The highway code expressly regulates that their operation must always be correct, except for incurring administrative penalties. Let's see in this guide how to replace the front light. The light to be changed is connected to the bodywork with screws and to the battery with cables. First of all, we must disconnect the plugs of the cables of our light, which are usually easily visible and identifiable. Then with a Phillips screwdriver we have to remove the internal screws of the light that bind it to the bodywork, using the utmost care and attention, then keeping them in a safe place in order not to lose them. We thus remove the old light by pushing the part of the light inside the bonnet outwards.
Posted on 15 September 2023 by ScegliAuto
 Headlight bulb replacement
Volkswagen Jetta (2005-2010 / MK 5, A5) The replacement of the bulb can be carried out without having to disassemble the headlight as there is enough space to access the bulb holder. Once t 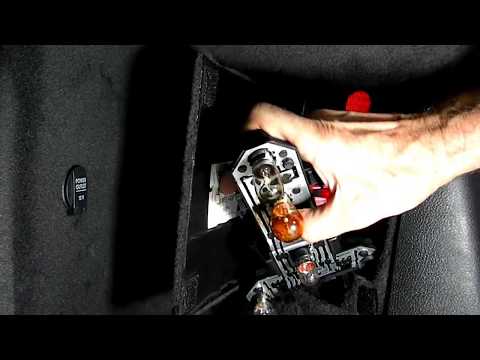 How to replace the brake light bulb on the rear headlight of a Volkswagen Jetta.
Volkswagen Jetta (2010-2018 / A6, MK 6) If we need to replace the brake light bulb on the rear headlight of this car model, in the description below we will find all the useful information 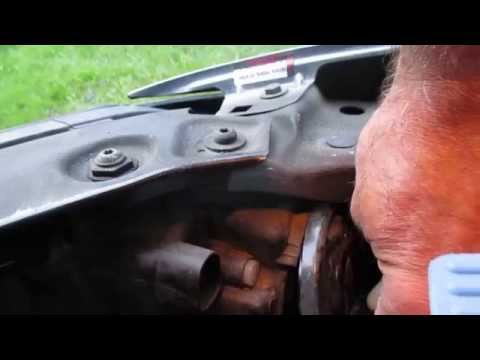 How to replace a headlight bulb on a Volkswagen Jetta.
Volkswagen Jetta (2010-2018 / A6, MK 6) If we have noticed that a headlight bulb on our car has burned out, in the description below we will find the information and steps to be taken for r Other guides that may interest you
|
How do I replace the Land Rover Evoque auxiliary battery?
In order to replace the auxiliary battery of the Land Rover Evoque, it is necessary to go inside the passenger compartment and remove the panel which is positioned immediately under the glovebox. Once the screws that secure this panel have been loosened, it will be possible to access the components located in its rear part, including the auxiliary battery. The latter must be disconnected from its cables and the fixing screws must be loosened. The battery can then be replaced with a new one and the panel can be fixed again with its screws. by ScegliAuto More videos
|
|
For advertising on this site Write to info@scegliauto.com
ScegliAuto is not responsible for any inaccuracy of the data in the lists. To report any inaccuracy or your business (if you own the business in question), please write to info@scegliauto.com
Number of seconds to generate the page: 0.086
(c) ScegliAuto 2024 - info@scegliauto.com - Privacy Policy VAT number: IT01247470535 |