
|
Do it yourself
| |||
| ||||


How to reupholster the door panel of a VW Polo
Model: Volkswagen Polo
MK IV, Polo IV, Polo 4, MK 4, 9N
- Years 2001-2009
Today with the help of this video tutorial we will explain how to cover the door panel of a Volkswagen Polo. The first thing to do is to remove the door panel, to do this you will first need to remove the handle, using a screwdriver as a lever and then remove the four central screws. Then you will need to remove the three lower screws and pull the panel outwards. Once the panel is removed from the door, we can proceed to remove the fabric because the panel is not detachable, it will be necessary to heat the plastic to remove the part where the fabric is placed. Finally, we can proceed to remove the old fabric. Before applying the new one, however, it is necessary to remove the previous glue using sandpaper. Once the panel is clean, we apply a layer of glue and lay the new fabric. With the use of epoxy glue, we can reassemble the panel on the door. When the work is dry, you can reassemble the panel on the door.
Posted on 17 April 2024 by ScegliAuto
This video is currently unavailable
Related tutorials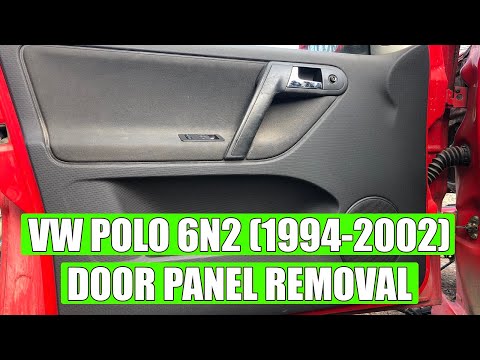
Volkswagen Polo
(1994-2003 /
MK III, Polo III, Polo 3, MK 3, 6N)
Need to remove the door panel on a VW Polo? Let's go through the removal process. Use a screwdriver to unscrew the screws located in the area of the …

Volkswagen Polo
(2009-2017 /
Polo 5, Polo V, MK 5, MK V, 6R)
Following these brief instructions, we will see how to disassemble the front door panel and speaker of the Volkswagen Polo. First, open the front doo…

Volkswagen Polo
(2009-2017 /
Polo 5, Polo V, MK 5, MK V, 6R)
Here are the instructions for removing and replacing the front door panel and speakers on a Volkswagen Polo. First, open the front door of your car a…
Other guides you may be interested in
|
How to Reset the Tyre Pressure Light on the Opel Grandland X
While driving, if you notice the tyre pressure warning light coming on, first check the actual inflation pressure of the tyres and, if necessary, restore the pressures recommended by the manufacturer. After restoring the correct pressures, you need to reset the warning light that has illuminated on the instrument cluster. To do this, locate the reset button on the lower central console. Press this button and hold it down for at least 3 seconds, after which the low pressure indication will turn off. by ScegliAuto More videos
|
|
For advertising on this site Write to info@scegliauto.com
ScegliAuto is not responsible for any inaccuracy of the data in the lists. To report any inaccuracy or your business (if you own the business in question), please write to info@scegliauto.com
Number of seconds to generate the page: 0.062
(c) ScegliAuto 2026 - info@scegliauto.com - Privacy policy VAT number: IT01247470535 |
