
|
Do it yourself
| |||
| ||||


Alfa Romeo 147 - Video tutorial
Model: Alfa Romeo 147
MK 1
- Years 2000-2010 To replace the glow plugs of the Alfa Romeo 147, let's skip directly to minute 3.05 of the video, as the first part shows how to recognize which glow plug to replace. So, we start the engine and let it reach a temperature of 90 degrees; once it reaches this temperature, we turn it off, disconnect the battery, and remove the top part of the engine (where it says Alfa Romeo). After removing the upper engine cover, we unscrew the bracket bolt on the side of the top part of the engine to create some space. Using a series of extensions and a socket wrench, we unscrew the first glow plug on the right, insert the new glow plug, and tighten it. Now we move on to the second glow plug on the right, which can be found by moving the pipe underneath the recess after unscrewing the bracket bolt. We unscrew it and, using a series of extensions and a socket wrench, insert the new glow plug and tighten it. For the third and fourth glow plugs, we disconnect the connector near the diesel filter and the two bolts near the filter. After unscrewing the part, we unscrew the last two glow plugs with a series of extensions and a socket wrench, insert the last two new glow plugs, and tighten them. We also tighten the last two glow plugs, reassemble everything, reconnect the battery, and start the car, checking if the glow plug indicator light has turned off.
Posted on 10 September 2023 by ScegliAuto
Other guides that may interest you
|
How do you replace the battery of the BMW R 1250 GS?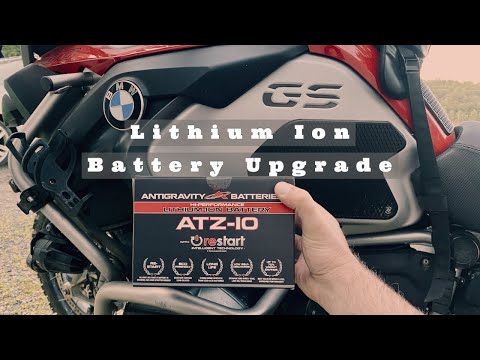
In order to replace the battery of the BMW R 1250 GS it is necessary to loosen the bolts that secure the casing positioned on the left side of the bike, so that its cover can be removed. Once this has been removed, you will be able to access the components below, including the battery. The latter must be removed from its housing by disconnecting the power cables and unscrewing the appropriate fixing bolts. In this way it will be possible to insert a new battery, properly fixing it and connecting it to the relative cables, covering everything with the casing. by ScegliAuto More videos
|
|
For advertising on this site Write to info@scegliauto.com
ScegliAuto is not responsible for any inaccuracy of the data in the lists. To report any inaccuracy or your business (if you own the business in question), please write to info@scegliauto.com
Number of seconds to generate the page: 0.042
(c) ScegliAuto 2024 - info@scegliauto.com - Privacy Policy VAT number: IT01247470535 |