
|
Do it yourself
| |||
| ||||


Installing the iPod, iPhone, and Aux Adapter
Model: Audi A6
MK 3, C6
- Years 2004-2012
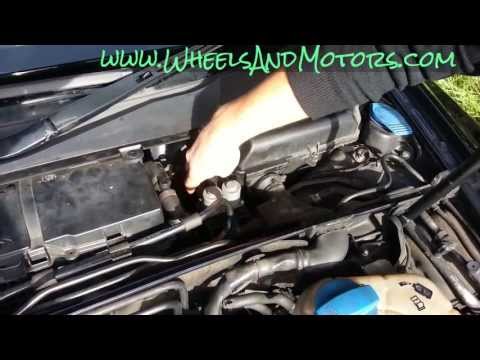
This video section explains how to install a Dension adapter (a manufacturer of integration systems for iPod/iPhone in cars) on an Audi A6. Use a plastic trim tool to detach the side panel of the dashboard on the passenger side, which is secured by three clips. Then, using an 8 mm socket, remove the bolt located at the bottom of the panel you just uncovered. Take out the bolt and insert it into the loop of the red power cable, then reattach the bolt. Insert the other end of the cable into the point shown in the video and hide the fuse in the indicated location. Pull the wiring harness and tuck it under the dashboard so you can retrieve the ends by pulling them from inside the glove compartment. Once you have retrieved the end, secure the fuse that you previously hid with a zip tie (trim any excess from the zip tie). Now you can reattach the side panel by snapping it back with its three clips. Now that the wiring is ready, passing the cables through the pre-drilled holes, you can install the Aux box and the USB cable holder. Screw them in from each side to the previously prepared panel. Pass the two cables through the soft structure of the panel. At this point, also remove the lower left side panel on the passenger side and retrieve the cables as indicated in the video.
Updated on 8 February 2026 by ScegliAuto
Video tutorial
Related tutorials
Audi A6
(2004-2012 /
MK 3, C6)
To install the AUX in Audi A6 models produced from 2004 to 2012, it will be necessary to remove some parts of the car's dashboard. As shown in the vi…
Audi A6
(2004-2012 /
MK 3, C6)
The flow of coolant through the cabin heater radiator is controlled by electric valves managed by the automatic climate control unit. Depending on th…
Audi A6
(1994-1997 /
MK 1, C4)
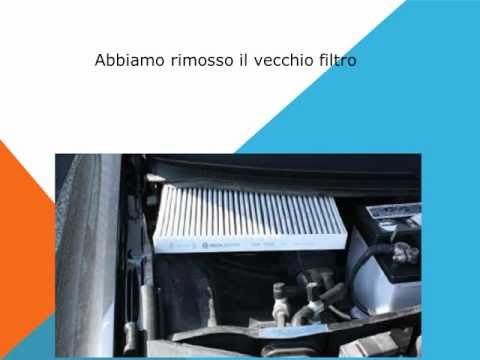
Replacing the cabin air filter is a straightforward procedure that you can do yourself without needing help from a trusted mechanic. The following gu…
Other guides you may be interested in
|
How to Remove the Headlight Bulbs on a Toyota Rav4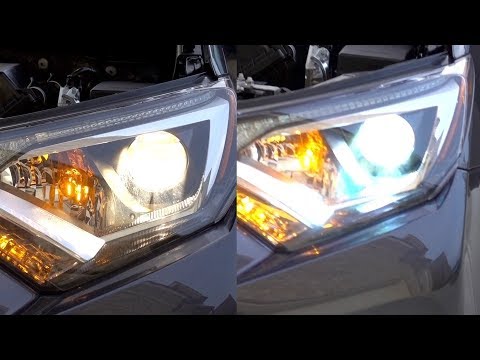
Let's see how to remove the headlight bulbs on a Toyota Rav4. Open the bonnet by pulling the lever located at the bottom right of the dashboard and secure it. Locate the inspection cap (if present) on the headlight and remove it (located at the rear of the headlight). At this point, you will find the bulbs with metal clips; pull the bulb holders out of the headlight and extract the damaged bulb using a screwdriver and pliers. Fit the new bulb (ensuring it is the correct type and size), insert the bulb holder back into the headlight housing, and close the headlight with the inspection cap. Test the lights to ensure they are functioning correctly. by ScegliAuto More videos
|
|
For advertising on this site Write to info@scegliauto.com
ScegliAuto is not responsible for any inaccuracy of the data in the lists. To report any inaccuracy or your business (if you own the business in question), please write to info@scegliauto.com
Number of seconds to generate the page: 0.052
(c) ScegliAuto 2026 - info@scegliauto.com - Privacy policy VAT number: IT01247470535 |