
|
Do it yourself
| |||
| ||||


|
To change the remote key from the original to the keyless version. In the package of the new key, there are accessories for disassembly: the operation consists of removing the electronics from the old key and transferring it to the new key. To open the old key, remove the battery compartment cover using a plastic lever, prying from the bottom side of the key to remove the cover. Use a small flathead screwdriver to pry up the battery from the bottom to take it out. After removing the battery, unscrew the 3 screws in the battery compartment (2 T4 and 1 T6 Torx); once the screws are removed, start to open it using the spring of the pin, gently lift the part of the key and remove it, revealing the electronics. To remove the electronics, use a flat screwdriver to pry at the points where you can disassemble it, lifting it slowly and disengaging the points with plastic tools. Once the electronics are removed, you can set the old key aside. Now disassemble the new key, which comes with the back (battery side) open: remove the key that you will later engrave at the hardware store with the same engraving as the old key. Use the button to remove the bottom part of the key, then use a plastic wedge to pry open the cover where the key buttons are located. Remove the side pieces, and you need to open the other side by inserting the plastic wedges into the appropriate holes. Now you can place the electronics into the new key in the shape made with the buttons, close the top cover, place the battery holder, insert the battery, put on the battery cover, insert the key inside, reinsert the side profiles by snapping them in, place the buttons in the appropriate frame that you will attach to the key, put the support for the pin in place, close the battery compartment and where the pin is, and as the last operation, place the sticker with the manufacturer's logo. You can reassemble the old key and keep it as a spare. Now you can test the new key and continue using it.
Updated on 4 June 2026 by ScegliAuto
Video tutorial
Related tutorials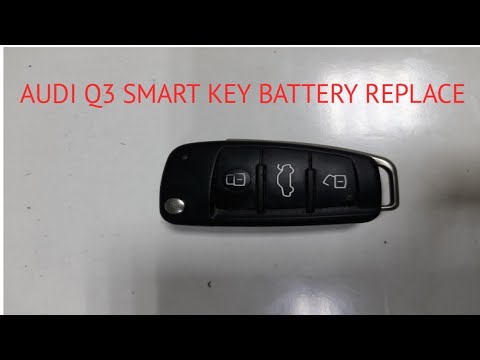
Audi Q3
(2011-2018 /
8U)
If the key for your Audi Q3 Mk1 has suddenly stopped working, it is most likely due to a completely dead battery. To replace it, you simply need a co…

Audi Q3
(2011-2018 /
8U)
To reset the Service light on the Audi Q3, insert the ignition key into the ignition switch to activate the dashboard. Once the dashboard is on, repe…

Audi Q3
(2011-2018 /
8U)
To replace the battery in the Audi Q3 remote, press the button located on the top of the remote and lift the key to free its housing. Use a small scr…
Other guides you may be interested in
|
How to Adjust the Brightness of the Instrument Cluster on a Peugeot 3008?
To adjust the brightness of the instrument cluster on a Peugeot 3008, you need to turn on the ignition and access the settings via the menu located in the central area of the dashboard. In the screen that appears, select the "Display Configuration" option: now, by selecting the "Brightness" option, you can adjust it using the dedicated slider that will appear on the screen. The adjustment should be made with the headlights on as well as with them off. Once the adjustment is complete, you can turn off the instrument cluster. by ScegliAuto More videos
|

|
For advertising on this site Write to info@scegliauto.com
ScegliAuto is not responsible for any inaccuracy of the data in the lists. To report any inaccuracy or your business (if you own the business in question), please write to info@scegliauto.com
Number of seconds to generate the page: 0.549
(c) ScegliAuto 2026 - info@scegliauto.com - Privacy policy VAT number: IT01247470535 |
