
|
Do it yourself
| |||
| ||||


How to remove the rear bumper of the Audi A4 B8
Model: Audi A4
B8
- Years 2007-2016
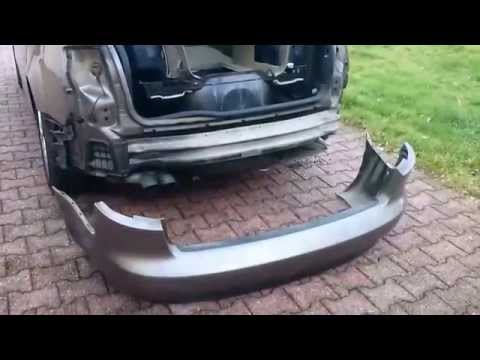
In the following article, we will see how to disassemble the rear bumper of the Audi A4 B8 in order to repair or replace it. First, you need to remove the plastic covers located in the trunk, then remove the cover, at this point you need to remove the plastic covers. Once the covers are removed, you will need to remove the fastening pins with a 10mm socket wrench, once removed, you need to use the Torx T25 key to remove the screws located on the wheel arches of the rear wheels, at this point also remove the 3 screws located under the bumper, always with the Torx T25 key, and remove the plastic clips located under the bumper. At this point, you need to remove the headlights and then remove the bumper fastening pin using a flathead screwdriver, then remove the bumper and disconnect the connectors.
Posted on 30 June 2024 by ScegliAuto
Video tutorial
Related tutorials
Audi A4
(2004-2008 /
B7)
How to remove the rear bumper of an Audi A4? Follow these steps to proceed, a task that is not too complex if done in order: First, use a screwdriver…
Audi A4
(2004-2008 /
B7)
How to remove the rear bumper on Audi A4? Follow these steps for a straightforward operation: open the trunk, grab a Phillips screwdriver and a socke…

Audi A4
(2007-2016 /
B8)
If you want to disassemble the rear bumper of your Audi A4 B8 by yourself, just read carefully the following guide and follow the step-by-step proced…
Other guides you may be interested in
|
How to Adjust the Brightness of the Instrument Cluster on a Peugeot 3008?
To adjust the brightness of the instrument cluster on a Peugeot 3008, you need to turn on the ignition and access the settings via the menu located in the central area of the dashboard. In the screen that appears, select the "Display Configuration" option: now, by selecting the "Brightness" option, you can adjust it using the dedicated slider that will appear on the screen. The adjustment should be made with the headlights on as well as with them off. Once the adjustment is complete, you can turn off the instrument cluster. by ScegliAuto More videos
|

|
For advertising on this site Write to info@scegliauto.com
ScegliAuto is not responsible for any inaccuracy of the data in the lists. To report any inaccuracy or your business (if you own the business in question), please write to info@scegliauto.com
Number of seconds to generate the page: 0.190
(c) ScegliAuto 2026 - info@scegliauto.com - Privacy policy VAT number: IT01247470535 |
