
|
Do it yourself
| |||
| ||||


Removal of Intake Manifold Swirl Flaps
Model: BMW Serie 5
E60, E61
- Years 2003-2010
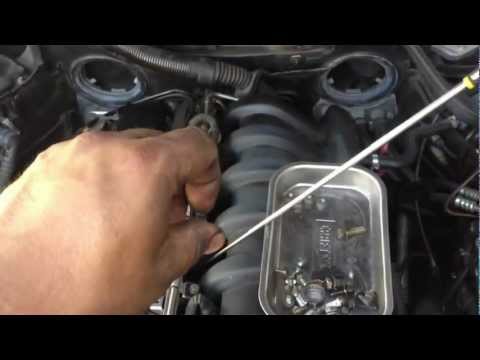
The breakage of the swirl flaps inside the intake manifold is a common issue with these engines, so it is advisable to remove them before this happens. This modification does not affect the engine's performance since these flaps primarily create turbulence (known as swirl) in the incoming air flow, which is not particularly relevant for its operation. This modification requires good mechanical knowledge and, above all, a lot of patience, as several components need to be disassembled. Start by removing the rear gasket of the engine bay and take out the cabin air filter housings; remove the engine cover and the anti-roll bar; then proceed to disconnect the injector wiring to finally remove the intake manifold by disconnecting the throttle body from the various ducts. Once the manifold is removed, plug the intake ports with clean paper to prevent foreign objects from entering. At this point, you can locate the control rod for the flaps: detach it to unscrew and extract the individual flaps. Finally, close the flap openings with appropriate plates and proceed in reverse order for installation.
Updated on 13 February 2026 by ScegliAuto
Video tutorial
Related tutorials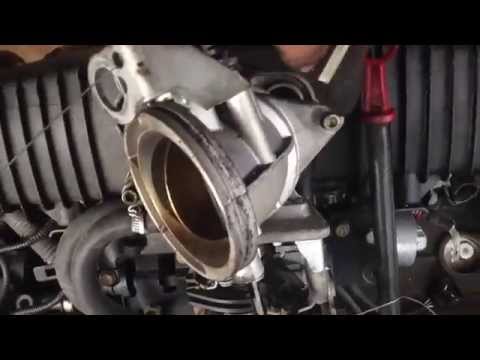
BMW Serie 5
(1995-2003 /
E39)
The intake manifold is a crucial component of the engine's fuel system that positively influences fuel consumption. The assembly steps for the intake…
BMW Serie 5
(1995-2003 /
E39)
For optimal engine performance, it is essential to have a good air-gasoline mixture ratio at the carburetor. Air enters the carburetor through the in…
BMW Serie 5
(1988-1995 /
E34)
Before installing the new intake manifold gaskets, it is essential to clean the gasket seats on both the manifold side and the cylinder head. Remove …
Other guides you may be interested in
|
Reset Tyre Pressure Light Toyota Yaris 2016
Due to advancements in onboard electronics, many vehicles are equipped with various sensors that monitor several operating parameters, including tyre pressure. Even if the pressure is correct, the warning light may sometimes illuminate on the dashboard. First, check with a gauge that the pressure in all 4 tyres matches the manufacturer's specifications. For the 2016 Toyota Yaris, the values are as follows: Front: 2.2 bar for T-type tyres, 2.3 for H-type, 2.4 for W-type. Rear: 2.2 bar for all tyre types. To reset the pressure light, turn on the ignition with the key, locate the reset button under the steering column. Press it for 3 seconds, and the light will flash 3 times before turning off. Remove the key from the ignition and start the vehicle. by ScegliAuto More videos
|

|
For advertising on this site Write to info@scegliauto.com
ScegliAuto is not responsible for any inaccuracy of the data in the lists. To report any inaccuracy or your business (if you own the business in question), please write to info@scegliauto.com
Number of seconds to generate the page: 0.098
(c) ScegliAuto 2026 - info@scegliauto.com - Privacy policy VAT number: IT01247470535 |