
|
Do it yourself
| |||
| ||||


How to temporarily repair the front seat of a Citroen C4
Model: Citroen C4
MK 1
- Years 2004-2010
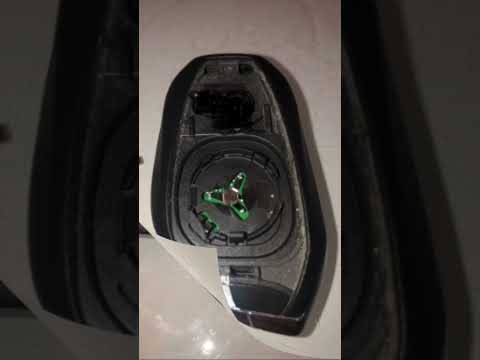
This video teaches us how to temporarily repair the front seat of a Citroen C4, where the head of the seat lowering mechanism is broken. The youtuber reminds us with common sense that in case of an accident, DIY repairs are heavily penalized by insurance companies, so it must be a temporary solution. However, you just need to attach the broken head to the hook with a wire; we will start by disassembling the head of the seat, unscrewing it, then we bend a piece of wire and shape it into a hook, then with pliers we grab the broken steel wire, wrap the wire around the head of the steel wire coming from inside the seat, pass the wire through the top of the lowering mechanism, and tighten it around the locking cylinder. Put the cover back in place by tightening the screw.
Posted on 19 November 2025 by ScegliAuto
Video tutorial
Related tutorials
Citroen C4
(2004-2010 /
MK 1)
In this video, we see how to temporarily repair the head of the front seat cable of a three-door Citroen C4. This is a serious problem because it pre…

Citroen C4
(2010-2018 /
MK 2)
In this guide, we will see the instructions that will allow us to disassemble the front seat of the Citroen C4. First, let's open the front door of t…
Citroen C4
(2020-2026 /
MK 3)
In today's video we see how to replace the battery of the Citroen C4 remote control currently on sale. First let's equip ourselves with a new unit, o…
Other guides you may be interested in
|
Installation of Upgraded Intercooler Radiator with Pipes
Lift the vehicle on suitable axle stands, remove the front wheels, and then the front bumper and grille. Proceed to remove the front headlights; drain the coolant, remove the intercooler radiator and the hoses connecting it to the intake system. Position the new intercooler radiator in the grille, temporarily securing it with cable ties, and mark with a marker the part of the metal that needs to be removed to allow the new hoses to pass through. Cut the marked portion of metal and apply a gasket to the edge. Remove the inner cover of the bumper and position it near the radiator to identify any interfering parts to eliminate: again, apply a gasket to the edge of the cut. Create brackets for securing the new radiator and proceed with the installation of the connecting pipes from the radiator to the intake, shaping and connecting them appropriately. Finally, reassemble the bumper, headlights, and grille. by ScegliAuto More videos
|

|
For advertising on this site Write to info@scegliauto.com
ScegliAuto is not responsible for any inaccuracy of the data in the lists. To report any inaccuracy or your business (if you own the business in question), please write to info@scegliauto.com
Number of seconds to generate the page: 0.054
(c) ScegliAuto 2026 - info@scegliauto.com - Privacy policy VAT number: IT01247470535 |