
|
Do it yourself
| |||
| ||||


How does the tire pressure monitoring system work on the Dacia Jogger?
Model: Dacia Jogger
MK 1
- Years 2021-2026
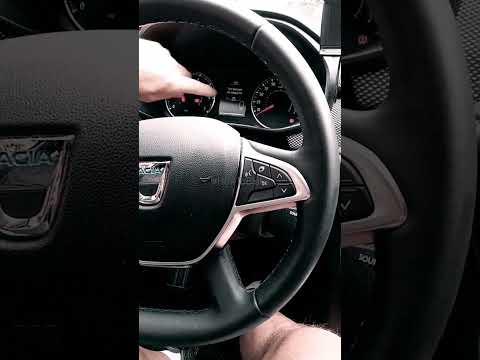
In this video we see how the tire pressure monitoring system (TPMS) of the Dacia Jogger works, which operates by measuring the speed of the vehicle's wheels. If a drop in pressure is detected on one of the tires, a dedicated warning light is displayed on the instrument panel to alert the driver. It is then necessary to check the pressure of all four tires, which must match the one indicated on the label located in the driver's door jamb. This operation must be done with cold tires. If a wheel has been replaced or if the inflation kit has been used, or if the vehicle is fully loaded, it is necessary to reset the pressure of all 4 tires. With the ignition on, press repeatedly the button located on the right side of the steering wheel until you reach the "vehicle" menu, then select the "tire pressure" option. Hold the button until the initialization starts, and keep it pressed until the message of operation completed is displayed. If the warning light continues to stay on along with the wrench symbol, it means there is a malfunction in the system.
Posted on 31 May 2024 by ScegliAuto
Video tutorial
Related tutorials
Dacia Jogger
(2021-2026 /
MK 1)
In this video, we can see how the tire pressure monitoring system works on the Dacia Jogger. It is an indirect system that relies on the rotation of …
Dacia Jogger
(2021-2026 /
MK 1)
To reset the tyre pressure warning light on the Dacia Jogger, first inflate the tyres to the pressure values indicated on the sticker attached to the…

Dacia Jogger
(2021-2026 /
MK 1)
The activation of the tire pressure warning indicates a loss of pressure with possible puncture on one or more tires; let's see the reset procedure f…
Other guides you may be interested in
|
How to Open a Stuck Boot on the Peugeot 407?
On the Peugeot 407, the boot may become stuck, possibly due to a problem with the control button or the lock actuator. In such cases, you can perform an emergency opening by following the simple procedure shown in this tutorial. First, open the rear doors, then lower the seat back by operating the release lever. Next, go inside the boot, locate the lock, and manually operate it using a flathead screwdriver. The boot will then be free to open. by ScegliAuto More videos
|

|
For advertising on this site Write to info@scegliauto.com
ScegliAuto is not responsible for any inaccuracy of the data in the lists. To report any inaccuracy or your business (if you own the business in question), please write to info@scegliauto.com
Number of seconds to generate the page: 0.573
(c) ScegliAuto 2026 - info@scegliauto.com - Privacy policy VAT number: IT01247470535 |
