
|
Do it yourself
| |||
| ||||


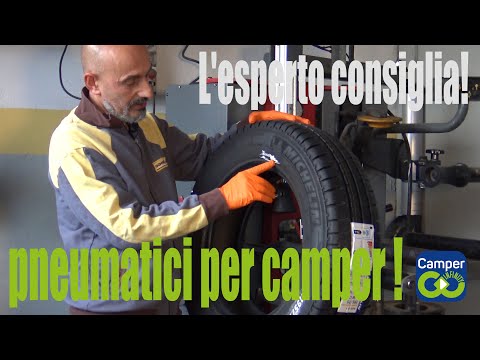
Specific tips for the tires of Fiat Ducato motorhome.
Model: Fiat Ducato
X250
- Years 2006-2014
In this video, we will see specific advice on tires for caravans: summer tires need chains in the winter; all-season tires are recognized by the M+S (mud+snow) marking; if the tire also has the mountain with 3 peaks and the snowflake (3PMFS) then it is a winter tire. The important thing is to know how the camper is used: if it is only used in summer, then a summer tire is more than enough. If you also use it in winter to go on snow, then a double set of tires for switching to winter tires will be necessary. But let's see specifically what all the numbers on tires indicate; for example, the "CP" code indicates that the tire has been specifically designed for campers, which are not made by all manufacturers, and are summer tires. The first measurement indicates the tread width, the second measurement is the shoulder width, the R indicates the radius expressed in inches, the DOT indicates the production date, week and year of production, very important on a camper, where the tire ages before the tread wears out. Another very important thing is the pressure: a camper is always fully loaded, so the tires are always under stress. Balancing inside the camper is very important, so as not to put more strain on one tire than another.
Posted on 7 March 2024 by ScegliAuto
Video tutorial
Related tutorials
Fiat Ducato
(2014-2024 /
X290)
In this video we can see how to remedy the problem of the service battery not charging enough to power all the appliances in a Fiat Ducato camper. We…
Fiat Ducato
(2006-2014 /
X250)
In this video we see how we can choose tires for a Fiat Ducato camper. First, we see the size on the side: in this specific case, 195 is the width, 7…

Fiat Ducato
(2014-2024 /
X290)
The procedure for replacing the oil filter on a Fiat Ducato camper may seem very long and difficult to do on your own, but with our tutorial you will…
Other guides you may be interested in
|
How to Replace the Antenna on a Volkswagen Bora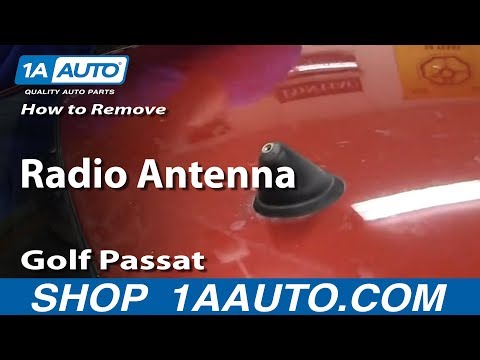
Want to replace the damaged radio antenna on your car but don't know how to proceed? In this video, we will show you the very simple steps to take. After purchasing the new antenna (with the same size and thread as the original), unscrew the old one by hand until it is completely detached from its base. Take the new antenna and screw it (until fully tightened) into the plastic base on the roof of your car. Finally, check the correct functioning of the antenna by turning on the radio and receiving channels. by ScegliAuto More videos
|
|
For advertising on this site Write to info@scegliauto.com
ScegliAuto is not responsible for any inaccuracy of the data in the lists. To report any inaccuracy or your business (if you own the business in question), please write to info@scegliauto.com
Number of seconds to generate the page: 0.059
(c) ScegliAuto 2026 - info@scegliauto.com - Privacy policy VAT number: IT01247470535 |