
|
Do it yourself
| |||
| ||||


Installation of a 2 DIN radio on a first generation Ford Kuga.
Model: Ford Kuga
C394, MK 1
- Years 2008-2012
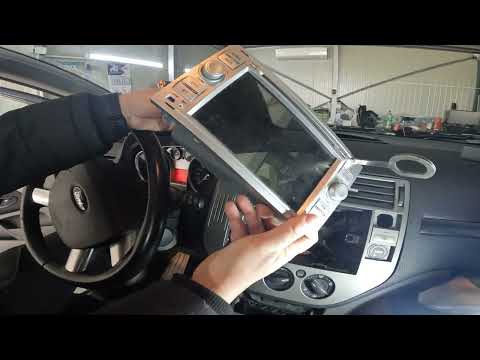
In this video we see how to install a 2DIN radio on a first series Ford Kuga; some knowledge of electronics is necessary to do this job well. It is an Atoto radio that we can find on Amazon with the code B079D1KN7B at a price of 259.90 euros, free delivery for Prime customers. To preserve the functionality of the steering wheel controls, it is necessary to also install a control unit that can be found on E-Bay with the code 110963019642 at a price of 89.99 euros, free delivery. First, we remove the old stereo with the appropriate keys; disconnect the electrical connectors; connect the control unit for steering wheel controls recovery; the radio cable must be inserted into the control unit socket; after making the connections as the youtuber teaches us, we can install the screen and position it with the frame we have obtained in the meantime. We install everything and the operation is very effective. Voice commands are not recovered.
Posted on 20 September 2024 by ScegliAuto
Video tutorial
Related tutorials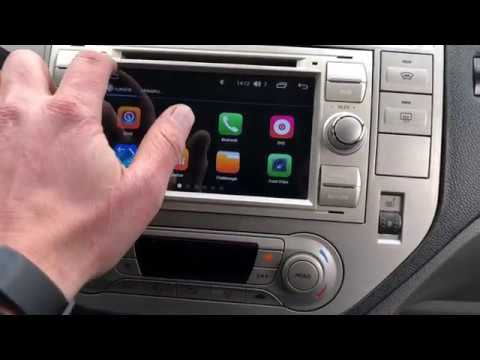
Ford Kuga
(2008-2012 /
C394, MK 1)
Replacing the radio on a Ford Kuga? Let's see how the radio is disassembled with the very useful removal keys. Insert the keys into the slots on the …
Ford Kuga
(2008-2012 /
C394, MK 1)
To successfully dismantle the car stereo in the interior of your first-generation Ford Kuga (2008-2012), just follow a few simple steps. First, enter…

Ford Kuga
(2008-2012 /
C394, MK 1)
The first thing to do to remove the console of your 2010 Ford Kuga is to remove the central part of the car console under the radio and then the radi…
Other guides you may be interested in
|
How to Replace the Front Wing of a Renault Clio
First, remove the wheel where the replacement will occur, then lift the vehicle. This will provide easy access to the clips and bolts securing the wing from the inside. Next, remove the bolts located on the underside of the body and any remaining screws. You can now comfortably extract the entire inner part of the wing. To remove the bumper, follow the instructions in the video. To reassemble the wing, simply retrace the steps in reverse. by ScegliAuto More videos
|

|
For advertising on this site Write to info@scegliauto.com
ScegliAuto is not responsible for any inaccuracy of the data in the lists. To report any inaccuracy or your business (if you own the business in question), please write to info@scegliauto.com
Number of seconds to generate the page: 0.115
(c) ScegliAuto 2026 - info@scegliauto.com - Privacy policy VAT number: IT01247470535 |