
|
Do it yourself
| |||
| ||||


How do you reset the tire pressure warning light on the Honda Jazz?
Model: Honda Jazz
MK 3
- Years:
2013, 2014, 2015, 2016, 2017, 2018, 2019
Video tutorial
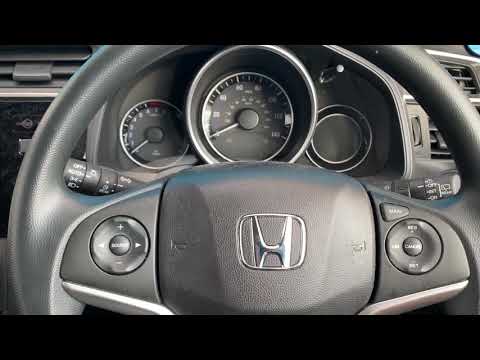
To reset the tire pressure warning light on the Honda Jazz, you need to inflate the tires until they reach the recommended pressure value: the correct value will be indicated on the sticker attached to the driver's side door pillar. Once the inflation is done, you can navigate through the menu that will appear on the display to the right of the instrument panel: you will need to use the arrows on the right side of the steering wheel until you find the "Deflation Warning System" option. When this option is displayed, you will need to press and hold the SEL RESET button to make the warning light disappear.
Posted on 12 June 2025 by ScegliAuto
Related tutorials
Honda Jazz
(2013-2019 /
MK 3)
By following these simple steps, you will see how to reset the tyre pressure warning light on a Honda Jazz. Before performing the reset, ensure that …

Honda Jazz
(2013-2019 /
MK 3)
The tire pressure warning light that appears on the instrument panel of the Honda Jazz can be reset by inflating the tires to the recommended pressur…
Honda Jazz
(2013-2019 /
MK 3)
After restoring the pressure in all tyres, for example due to a puncture or a general loss of pressure, you need to manually reset the tyre warning l…
Other guides you may be interested in
|
How to Remove the Rear Seat of a Hyundai Tucson?
To remove the rear seat of a Hyundai Tucson, follow these steps. Start by moving the front seats to their most forward position to gain space. Next, locate the release lever on the underside of the rear seat, near the floor. Press this lever down while pulling the seat upwards to unlock it from the anchor pins. Once unlocked, tilt the seat upwards and forwards to remove it from its position. Repeat this process for both sides of the rear seat. Be careful of any electrical cables or components that may be connected to the seat during removal. Once the rear seat is removed, the disassembly is complete. by ScegliAuto More videos
|
|
For advertising on this site Write to info@scegliauto.com
ScegliAuto is not responsible for any inaccuracy of the data in the lists. To report any inaccuracy or your business (if you own the business in question), please write to info@scegliauto.com
Number of seconds to generate the page: 0.084
(c) ScegliAuto 2026 - info@scegliauto.com - Privacy policy VAT number: IT01247470535 |
