
|
Do it yourself
| |||
| ||||


Hyundai Kona - Engine oilEngine Oil Hyundai Kona (2017-2023 / mk 1) Hyundai Kona (2017-2023 / MK 1)
How to replace the engine oil in a 2018 Hyundai Kona Today we will explain how to replace the motor oil of the Hyundai Kona in less than 10 minutes. To perform the oil replacement, we must purchase the TRAVELLER …Read all… Posted on 30 April 2025 by ScegliAuto  Hyundai Kona (2017-2023 / MK 1)
How to Replace Oil and Filter on Hyundai Kona How to replace oil and filter on a Hyundai Kona? Open the car door and pull up the engine compartment release lever located at the bottom left of the …Read all… Posted on 26 March 2026 by ScegliAuto 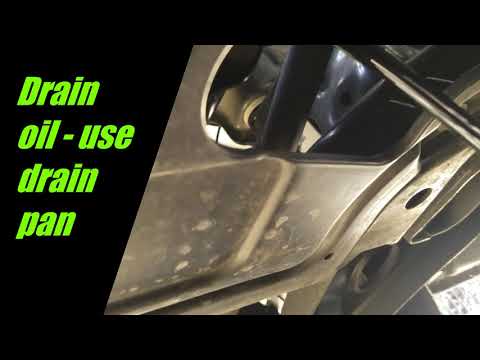 Hyundai Kona (2017-2023 / MK 1)
How to Change the Engine Oil and Filter in the Hyundai Kona To replace the engine oil and oil filter, locate two holes underneath the Hyundai Kona: one at the rear for accessing the bolt that allows the old oil to drain …Read all… Posted on 17 March 2026 by ScegliAuto
Hyundai Kona (2017-2023 / MK 1)Engine Oil and Filter Replacement on a Hyundai Kona Replacing the engine oil and its filter is one of the first DIY maintenance tasks you learn to perform. It is recommended to place the vehicle on suitable car …Read all… Posted on 16 March 2026 by ScegliAuto Airbag (1) Car stereo (1) Battery (7) Body (3) Key (39) Timing belt (1) Onboard computer (8) Checks and maintenance (11) Dashboard (1) Tail light (1) Fog lights (1) Air filter (3) Cabin air filter (4) Oil filter (2) Parking brake (1) Light bulb (1) Side marker bulb (4) Headlight bulb (7) License plate light (1) Engine oil (4) Clock (4) Door trim panel (3) Front bumper (3) Rear bumper (2) Tires (1) Instrument cluster (5) Fuse box (10) AdBlue warning light (1) Warning light – error code (12) (24) Tire pressure warning light (7) Service warning light (83) Fuel cap (1) |
How to replace the gear knob in the Peugeot 3008?
In this tutorial, see how to replace the gear knob in the Peugeot 3008, a very simple and quick operation. First, enter the cabin, then using a plastic spatula, unclip the base of the gaiter by prying along the perimeter. Next, lift the gaiter itself, disconnect the indicated connector and pull the knob off the shaft with force upwards. At this point, simply cut the retaining strap, attach the replacement to the gaiter with a new strap and follow the reverse procedure. by ScegliAuto More videos
|
|
For advertising on this site Write to info@scegliauto.com
ScegliAuto is not responsible for any inaccuracy of the data in the lists. To report any inaccuracy or your business (if you own the business in question), please write to info@scegliauto.com
Number of seconds to generate the page: 0.006
(c) ScegliAuto 2026 - info@scegliauto.com - Privacy policy VAT number: IT01247470535 |
