
|
Do it yourself
| |||
| ||||


How to Replace the Thermostat and Clean the Heating Radiator on a Hyundai i10
Model: Hyundai I10
IA, MK 2
- Years 2013-2020
The Hyundai i10 in the video does not heat the cabin air, even though the engine reaches very high temperatures. The diagnosis is that the thermostat is broken and the internal heat exchanger is clogged. The YouTuber starts by cleaning the internal heating circuit, accessible from the engine bay, near the windscreen, passenger side; two pipes lead to the cabin and are the flow and return pipes for heating. They must be disconnected. The goal is to circulate a mixture of water and vinegar through the small internal radiator to dissolve and remove deposits, restoring the flow of warm air. The thermostat is also replaced, which is mentioned but not shown in the video. Typically, the thermostat is located where the upper radiator hose connects to the engine (on the cylinder head, or near the timing chain cover). It is found in a plastic or metal housing. To replace the thermostat, it is best to disconnect the battery and drain some coolant, then remove the hoses and bolts securing the thermostat housing, clean the mating surfaces, fit the new thermostat with its gasket, and reattach and tighten the hoses.
Posted on 20 February 2026 by ScegliAuto
Video tutorial
Related tutorials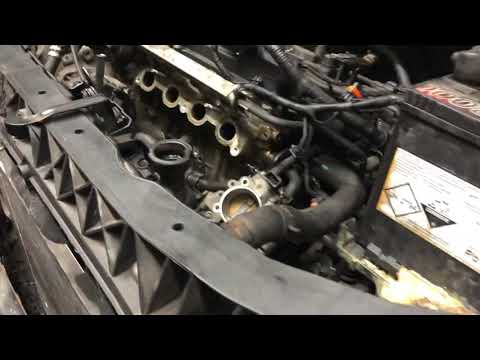
Hyundai I10
(2007-2013 /
PA, MK 1)
In this guide, we will see the main instructions for removing and replacing the thermostat on a Hyundai I10. First, open the bonnet and start by remo…

Hyundai I10
(2007-2013 /
PA, MK 1)
Before starting, open the front bonnet of your Hyundai i10 and remove the battery for safety. Begin by dismantling and removing the entire air filter…

Hyundai I10
(2007-2013 /
PA, MK 1)
Today's guide will show you how to remove and replace the entire dashboard of the Hyundai I10. First, get in the vehicle and start unscrewing the scr…
Other guides you may be interested in
|
How to Connect the Cables to the Battery of the Citroen Xsara Picasso?
In this tutorial, you will see how to connect the cables to the battery of the Citroen Xsara Picasso, useful if you need to recharge it or perform an emergency start. First, ensure the key is not inserted, then open the bonnet and move to the front of the left headlamp. Next, locate the bolt just behind the filter box and connect the positive terminal clamp to it. Now you can connect the negative terminal to any point on the chassis, such as the indicated point. Once the operation is complete, ensure you disconnect the negative first and then the positive. by ScegliAuto More videos
|

|
For advertising on this site Write to info@scegliauto.com
ScegliAuto is not responsible for any inaccuracy of the data in the lists. To report any inaccuracy or your business (if you own the business in question), please write to info@scegliauto.com
Number of seconds to generate the page: 0.249
(c) ScegliAuto 2026 - info@scegliauto.com - Privacy policy VAT number: IT01247470535 |
