
|
Do it yourself
| |||
| ||||


How the Tyre Pressure Monitoring System Works on the Hyundai i20
Model: Hyundai I20
GB, IB, MK 2
- Years 2014-2021
Learn how the tyre pressure monitoring system works on the Hyundai i20: information is displayed on the LCD screen between the instruments on the dashboard. Use the control buttons on the steering wheel to navigate to the correct screen and scroll until you see the pressure values for all four tyres. The message "Drive to display" indicates that you need to drive for a few minutes to update the tyre sensors. If a low-pressure warning appears, a yellow light will also illuminate on the dashboard, and you must stop to check and inflate the tyres to the correct pressure. The spare wheel, if present, does not have a TPMS sensor, so if you fit it, the indicator will flash for about a minute and then remain on until you replace it with the original wheel and drive for a few minutes. To change the pressure unit (PSI/bar/Kpa) using the navigation system: setup/general/measurement unit/tyre pressure. Without a navigation system: user settings/other/measurement unit.
Posted on 5 May 2026 by ScegliAuto
Video tutorial
Related tutorials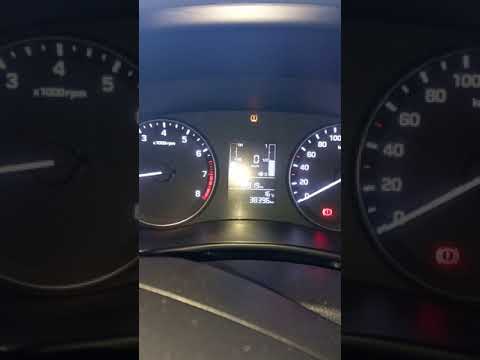
Hyundai I20
(2014-2021 /
GB, IB, MK 2)
Today we will see the instructions that will allow us to reset the tire pressure warning light of the Hyundai I20, in simple and quick steps. The car…

Hyundai I20
(2020-2026 /
BC3, MK 3)
When the TPMS warning light illuminates on the Hyundai i20 with the message "Check tyre pressure monitoring system", it means that at least one tyre …

Hyundai I20
(2020-2026 /
BC3, MK 3)
How do you reset the tyre pressure on a Hyundai i20? First, bring all four tyres to the pressure recommended by the manufacturer, referring to the la…
Other guides you may be interested in
|
How to Replace the External Wing Mirror on a Ford C MAX
In the event of a breakage, it will be necessary to replace the external wing mirror on the 2011 Ford C MAX. This operation is easily performed independently. Start by removing the internal cover of the mirror with a plastic lever. Then, use a socket wrench to remove the securing pins. Once the pins are removed, you can take off the mirror, but not before disconnecting the power connectors. Then proceed to fit the new mirror. First, connect the connectors and then secure the mirror to its housing with the pins. Refit the plastic cover and test the operation of the electric mirror using the controls. by ScegliAuto More videos
|

|
For advertising on this site Write to info@scegliauto.com
ScegliAuto is not responsible for any inaccuracy of the data in the lists. To report any inaccuracy or your business (if you own the business in question), please write to info@scegliauto.com
Number of seconds to generate the page: 0.074
(c) ScegliAuto 2026 - info@scegliauto.com - Privacy policy VAT number: IT01247470535 |
