
|
Do it yourself
| |||
| ||||


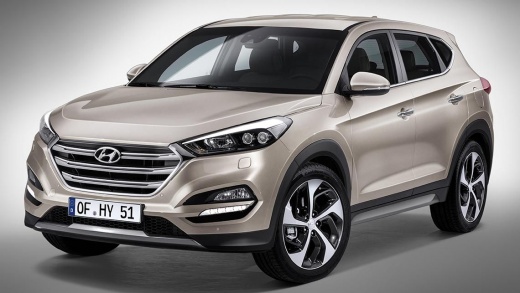
How to Fit Mud Flaps on a Hyundai Tucson
Model: Hyundai Tucson
MK 3, TL
- Years:
2015, 2016, 2017, 2018, 2019, 2020, 2021
Video tutorial
Let's see how to fit mud flaps on your Hyundai Tucson: you will only need a star screwdriver. For the front, simply remove the three screws from the wheel arch, allowing you to easily screw in the mud flap, which will sit perfectly against the bodywork. Now position the rear part. At the back, there are only two screws and a clip at the bottom; you can remove it with a flat screwdriver. Position the mud flap with its screw and the lower clip. Before purchasing, to avoid the issue shown in the video, where the mud flap does not align perfectly, carefully check that the item you buy is compatible with your vehicle. The one we found on Amazon with code B0BS8P95XH costs £47.31 + £1.80 delivery.
Updated on 12 July 2026 by ScegliAuto
Related tutorials
Hyundai Tucson
(2022-2026 /
NX4, MK 4)
In this video, see how to fit mudguards on your Hyundai Tucson: the YouTuber uses original Hyundai parts, but you can also find them on Amazon, for e…

Hyundai Tucson
(2022-2026 /
NX4, MK 4)
In this video, learn how to install protective mudguards for the Hyundai Tucson 2023. You can find them on AliExpress with the code 1005006035109772 …

Hyundai Tucson
(2015-2021 /
MK 3, TL)
In this tutorial video, you will learn how to fit the battery of a Hyundai Tucson, as well as other Hyundai models. After removing the old battery, i…
Other guides you may be interested in
|
How to Remove the Rear Seat of a Hyundai Tucson?
To remove the rear seat of a Hyundai Tucson, follow these steps. Start by moving the front seats to their most forward position to gain space. Next, locate the release lever on the underside of the rear seat, near the floor. Press this lever down while pulling the seat upwards to unlock it from the anchor pins. Once unlocked, tilt the seat upwards and forwards to remove it from its position. Repeat this process for both sides of the rear seat. Be careful of any electrical cables or components that may be connected to the seat during removal. Once the rear seat is removed, the disassembly is complete. by ScegliAuto More videos
|
|
For advertising on this site Write to info@scegliauto.com
ScegliAuto is not responsible for any inaccuracy of the data in the lists. To report any inaccuracy or your business (if you own the business in question), please write to info@scegliauto.com
Number of seconds to generate the page: 0.035
(c) ScegliAuto 2026 - info@scegliauto.com - Privacy policy VAT number: IT01247470535 |
