
|
Do it yourself
| |||
| ||||


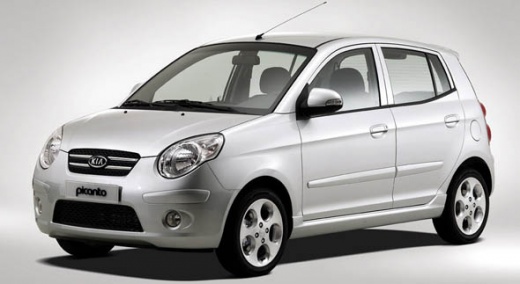
Where is the fuse box of the Kia Picanto located?
Model: Kia Picanto
MK 1, 2A
- Years:
2004, 2005, 2006, 2007, 2008, 2009, 2010, 2011
Video tutorial
The Kia Picanto has two fuse boxes inside; today, however, we will see in detail the location of the fuse box located inside the passenger compartment. The fuse box is located behind the driver's side glove compartment. Inside, we find all the fuses related to the operation of the electronic components of the passenger compartment, such as: the fuse for the interior light, the fuse for the heated seat, the airbag fuse, the radio fuse, the horn fuse, and so on. Behind the cover of the fuse box, there is a label that indicates the amperage and numbering of each individual fuse contained inside the box.
Posted on 8 September 2025 by ScegliAuto
Related tutorials
Kia Picanto
(2011-2018 /
TA, MK 2)
If you are curious about where the OBD2 port is located on your Kia Picanto second generation (2011-2018), just pay attention to the description in t…

Kia Picanto
(2004-2011 /
MK 1, 2A)
The fuses on the Kia Picanto are divided within the designated fuse boxes located inside the vehicle. In this model, there are two boxes: the first i…

Kia Picanto
(2011-2018 /
TA, MK 2)
The Kia Picanto has two fuse boxes. The first is located inside the cabin, specifically behind the driver's side dashboard. Inside this fuse box, you…
Other guides you may be interested in
|
Frequently Asked QuestionsHow to Remove the Rear Seat of a Hyundai Tucson?
To remove the rear seat of a Hyundai Tucson, follow these steps. Start by moving the front seats to their most forward position to gain space. Next, locate the release lever on the underside of the rear seat, near the floor. Press this lever down while pulling the seat upwards to unlock it from the anchor pins. Once unlocked, tilt the seat upwards and forwards to remove it from its position. Repeat this process for both sides of the rear seat. Be careful of any electrical cables or components that may be connected to the seat during removal. Once the rear seat is removed, the disassembly is complete. by ScegliAuto More videos
|
For advertising on this site Write to info@scegliauto.com
ScegliAuto is not responsible for any inaccuracy of the data in the lists. To report any inaccuracy or your business (if you own the business in question), please write to info@scegliauto.com
Number of seconds to generate the page: 0.117
(c) ScegliAuto 2026 - info@scegliauto.com - Privacy policy VAT number: IT01247470535 |
