
|
Do it yourself
| |||
| ||||


Replacement of the front headlights of the Kia Picanto
Model: Kia Picanto
TA, MK 2
- Years 2011-2018
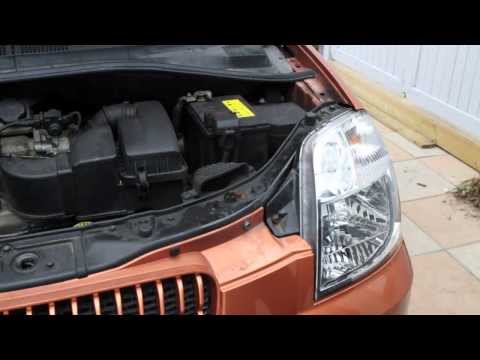
Let's see how to replace the front headlights of the Kia Picanto: here the fuse box obstructs access to the back of the headlight, making it impossible to even change a bulb without removing the entire headlight unit. We open the hood and remove the screws that secure the fender near the headlight; we also remove the screws that secure the headlight itself to the frame. There are additional screws in the gap between the bumper and the fender; then we unlock the plastic clips that secure the bumper, creating the necessary space to remove the headlight, which we will gently pull forward, then disconnect the electrical connector. We rotate the plastic cover and unlock the spring that holds the bulb; we remove the old one and install the new one without touching it with bare hands, reconnect the connector for a functional test and reassemble everything. It is not a simple operation like for other cars, but following the steps calmly is still feasible; the main difficulty is creating space to remove the headlight.
Posted on 4 October 2025 by ScegliAuto
Video tutorial
Related tutorials
Kia Picanto
(2011-2018 /
TA, MK 2)
Today's main instructions will show us the process of disassembling and replacing the front brake discs and pads of the Kia Picanto. First, we lift t…
Kia Picanto
(2004-2011 /
2A, MK 1)
Do you want to replace the headlight bulbs on your Kia Picanto? This is not a difficult task; here's how to do it. Lift and open the front bonnet of …

Kia Picanto
(2011-2018 /
TA, MK 2)
Are the bulbs on your Kia Picanto damaged? Here’s how to change them from inside the front headlights. Open the front bonnet by pulling the lever loc…
Other guides you may be interested in
|
How to Open the Bonnet on the Lancia Y
To open the bonnet on this vehicle, follow these simple instructions: first, open the driver's door and locate the lever positioned just below the dashboard, marked with an image of the vehicle with the bonnet open. Pull this lever towards you until you hear a "click" indicating the bonnet is released. Next, exit the cabin and stand in front of the bonnet to disengage the safety catch and complete the opening. To do this, slightly lift the bonnet, locate the yellow lever underneath, and pull it to the left to fully release and open the bonnet. by ScegliAuto More videos
|

|
For advertising on this site Write to info@scegliauto.com
ScegliAuto is not responsible for any inaccuracy of the data in the lists. To report any inaccuracy or your business (if you own the business in question), please write to info@scegliauto.com
Number of seconds to generate the page: 0.289
(c) ScegliAuto 2026 - info@scegliauto.com - Privacy policy VAT number: IT01247470535 |
