
|
Do it yourself
| |||
| ||||


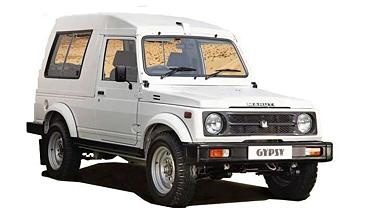
How to Fix Rust on the Floor of a Maruti Gipsy/Suzuki Jimny
Model: Maruti Gypsy
MK 1
- Years:
1985, 1986, 1987, 1988, 1989, 1990, 1991, 1992, 1993, 1994, 1995, 1996
Video tutorial
How to combat rust on the floor of a Maruti Gipsy/Suzuki Jimny. If your vehicle regularly does off-road work and travels on bumpy, very wet, and muddy roads, then the floor may have rusted over the years. We can try to remedy this with this DIY method, which may be a bit rustic but is definitely effective. First, remove the very obvious rust with a scraper or hammer. We recommend sanding it with not too fine sandpaper to at least restore some uniformity. Then apply a rust converter, such as Ferox, which comes in various formats and can be purchased according to your needs from common e-commerce platforms. Let it dry well and then paint it the color of the bodywork. The job is done.
Updated on 14 July 2026 by ScegliAuto
Related tutorials
Maruti Gypsy
(1985-2017 /
MK 1)
To replace the transmission fluid in a Maruti Gypsy, access the underside of the vehicle near the transmission. There, you will find the drain plug, …

Maruti Gypsy
(1985-2017 /
MK 1)
In this tutorial, you will see how to replace the headlights in the Maruti Gypsy, a very simple and quick operation. To do this, you will only need a…

Maruti Gypsy
(1985-2017 /
MK 1)
In this short and simple guide, learn how to change the rear differential oil on the Suzuki Gypsy by following the instructions below. First, move to…
Other guides you may be interested in |
How to Remove the Rear Seat of a Hyundai Tucson?
To remove the rear seat of a Hyundai Tucson, follow these steps. Start by moving the front seats to their most forward position to gain space. Next, locate the release lever on the underside of the rear seat, near the floor. Press this lever down while pulling the seat upwards to unlock it from the anchor pins. Once unlocked, tilt the seat upwards and forwards to remove it from its position. Repeat this process for both sides of the rear seat. Be careful of any electrical cables or components that may be connected to the seat during removal. Once the rear seat is removed, the disassembly is complete. by ScegliAuto More videos
|
|
For advertising on this site Write to info@scegliauto.com
ScegliAuto is not responsible for any inaccuracy of the data in the lists. To report any inaccuracy or your business (if you own the business in question), please write to info@scegliauto.com
Number of seconds to generate the page: 0.016
(c) ScegliAuto 2026 - info@scegliauto.com - Privacy policy VAT number: IT01247470535 |
