
|
Do it yourself
| |||
| ||||


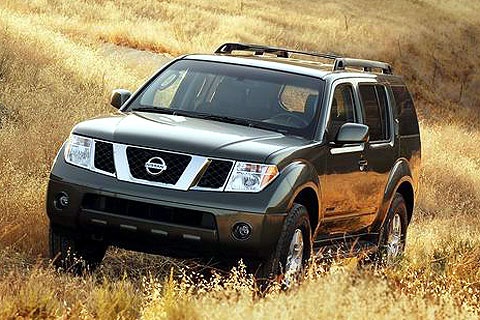
How do you locate the fuse box and relays in a Nissan Pathfinder 2005 - 2010?
Model: Nissan Pathfinder
MK 3, R51
- Years:
2005, 2006, 2007, 2008, 2009, 2010, 2011, 2012
Video tutorial
You will see that it is not difficult. To find the fuse and relay box in a Nissan Pathfinder, open the hood and look on the driver's side, near the battery: there is a black box with a plastic cover, often labeled FUSE BOX or with an electrical symbol. Just lift the cover to access the fuses in the engine compartment. There is also another one inside the cabin: sit on the driver's side, look under the dashboard, near the brake pedal, often a bit hidden. There you will also find a cover that can be removed with a snap. Inside each box there is a fuse map, convenient to know which one controls what. If an electrical component stops working, that's where you start looking. If you don't feel comfortable doing it yourself, remember that you can always contact a trusted mechanic.
Posted on 8 October 2025 by ScegliAuto
Related tutorials
Nissan Pathfinder
(2005-2012 /
MK 3, R51)
In this mini guide, you will discover where to find the fuse box on your Nissan Pathfinder Mk3. Before proceeding, ensure the vehicle is parked on a …
Nissan Pathfinder
(2005-2012 /
MK 3, R51)
Reaching the fuse box in a Nissan Pathfinder is straightforward, but it requires caution, especially if you intend to replace or maintain the various…

Nissan Pathfinder
(2005-2012 /
MK 3, R51)
Let's take a look at this brief video guide on the fuse diagram of a third-generation Nissan Pathfinder, produced in 2004. The diagrams shown in the …
Other guides you may be interested in
|
How to Remove the Rear Seat of a Hyundai Tucson?
To remove the rear seat of a Hyundai Tucson, follow these steps. Start by moving the front seats to their most forward position to gain space. Next, locate the release lever on the underside of the rear seat, near the floor. Press this lever down while pulling the seat upwards to unlock it from the anchor pins. Once unlocked, tilt the seat upwards and forwards to remove it from its position. Repeat this process for both sides of the rear seat. Be careful of any electrical cables or components that may be connected to the seat during removal. Once the rear seat is removed, the disassembly is complete. by ScegliAuto More videos
|
|
For advertising on this site Write to info@scegliauto.com
ScegliAuto is not responsible for any inaccuracy of the data in the lists. To report any inaccuracy or your business (if you own the business in question), please write to info@scegliauto.com
Number of seconds to generate the page: 0.118
(c) ScegliAuto 2026 - info@scegliauto.com - Privacy policy VAT number: IT01247470535 |
