
|
Do it yourself
| |||
| ||||


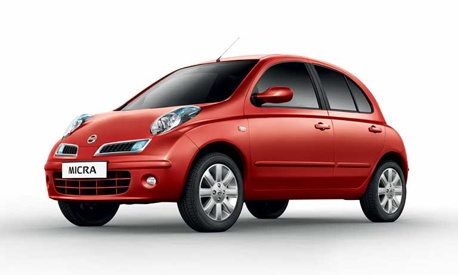
Replacement of Cabin Fan Resistor
Model: Nissan Micra
K12
- Years:
2002, 2003, 2004, 2005, 2006, 2007, 2008, 2009, 2010
This video is currently unavailable
If some speeds of the cabin ventilation fan do not work, there is a problem with the resistor that regulates the speed. To replace it, you need to remove the glove compartment to access the air duct located directly behind the centre console. First, remove the hinges at the bottom of the glove compartment and take off the door; unscrew the fixing screws of the glove compartment and remove it from its location. Locate the resistor, which is situated next to the duct, disconnect the power connector, unscrew the two fixing screws, and extract it. Then insert the new resistor, secure it with the screws, reconnect the power connector, ensure it functions correctly, and proceed in reverse order to reinstall everything that was previously removed.
Updated on 15 February 2026 by ScegliAuto
Related tutorials
Nissan Micra
(1992-2002 /
K11)
In this video, learn how to replace the heater fan resistor on a Nissan Micra K11: the fan only works at maximum speed. This is a simple and cost-eff…

Nissan Micra
(2002-2010 /
K12)
This guide shows how to replace the cabin air fan motor of the Nissan Micra K12. To perform this operation, remove the two trim panels from the front…

Nissan Micra
(2010-2017 /
K13)
The cabin fan mentioned can be seen in the video to get an idea of its actual design. Its task is to introduce hot or cold air into the cabin, but if…
Other guides you may be interested in |
How to Remove the Rear Seat of a Hyundai Tucson?
To remove the rear seat of a Hyundai Tucson, follow these steps. Start by moving the front seats to their most forward position to gain space. Next, locate the release lever on the underside of the rear seat, near the floor. Press this lever down while pulling the seat upwards to unlock it from the anchor pins. Once unlocked, tilt the seat upwards and forwards to remove it from its position. Repeat this process for both sides of the rear seat. Be careful of any electrical cables or components that may be connected to the seat during removal. Once the rear seat is removed, the disassembly is complete. by ScegliAuto More videos
|
For advertising on this site Write to info@scegliauto.com
ScegliAuto is not responsible for any inaccuracy of the data in the lists. To report any inaccuracy or your business (if you own the business in question), please write to info@scegliauto.com
Number of seconds to generate the page: 0.019
(c) ScegliAuto 2026 - info@scegliauto.com - Privacy policy VAT number: IT01247470535 |
