
|
Do it yourself
| |||
| ||||


How to change the heating resistor on an Opel Corsa C.
Model: Vauxhall Corsa
Corsa C
- Years 2000-2006
In this video, we will see how to change the resistor on an Opel Corsa "C". If the fan in our vehicle only works at the highest speed and not at the intermediate speeds, then the problem is almost certainly the resistor that has failed. In fact, the highest speed connects directly to the motor and works regardless, while the intermediate speeds need the resistor to function. This simple component is located under the glove compartment, towards the front of the passenger footwell (this is for a right-hand drive model), and we can easily find it online, for example on eBay with the code 335946878224 for the price of 16.16 euros plus 2 euros for shipping. You just need to disconnect it from the electrical connector it is attached to and replace it with a functioning one, and the fan will start working again at all speeds.
Posted on 17 December 2025 by ScegliAuto
Video tutorial
Related tutorials
Vauxhall Corsa
(2006-2014 /
Corsa D)
In this video, we will discover the steps to dismantle and replace the internal heater radiator on the Opel Corsa D. First, get inside the vehicle an…

Vauxhall Corsa
(2006-2014 /
Corsa D)
In this tutorial we can see how to replace the heating resistor in the Opel Corsa, an extremely simple and quick operation. First of all, make sure t…

Vauxhall Corsa
(2006-2014 /
Corsa D)
To replace the heating resistor of an Opel Corsa, access the vehicle from the passenger side. Remove the lower panel under the glove compartment by u…
Other guides you may be interested in
|
Frequently Asked QuestionsHow to reset the tyre pressure warning light on a Hyundai Tucson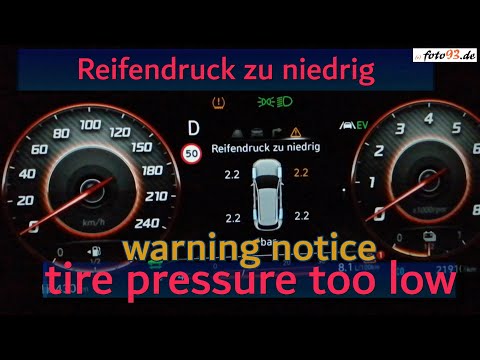
Below are the instructions to reset the tyre pressure warning light (TPMS) on a Hyundai Tucson. First, get into the vehicle and turn on the instrument cluster; then navigate to the vehicle settings until you reach the tyre pressure monitor, identifying the tyre with incorrect pressure. At this point, restore all tyre pressures according to the specifications indicated on the label; this will reset the TPMS and the warning light will be cleared from the instrument cluster! by ScegliAuto More videos
|
|
For advertising on this site Write to info@scegliauto.com
ScegliAuto is not responsible for any inaccuracy of the data in the lists. To report any inaccuracy or your business (if you own the business in question), please write to info@scegliauto.com
Number of seconds to generate the page: 0.540
(c) ScegliAuto 2026 - info@scegliauto.com - Privacy policy VAT number: IT01247470535 |
