
|
Do it yourself
| |||
| ||||


Renault Megane - Video tutorial
Model: Renault Megane
Megane 1
- Years 1995-2003 Raise the car and remove the wheel; before proceeding with disassembly, clean the caliper and hub with an iron brush. Then extract the lower pin locking pin and, using a pin punch of suitable diameter, extract the pad locking bar. Pry with a screwdriver between the pads to create enough space to be able to extract them; release the spring and extract the pads. To retract the caliper piston, it is necessary to rotate it clockwise: in the center of the piston there is a milling in which to insert a screwdriver transversely to leverage and rotate it. It is actually suggested to disassemble the pliers to work more comfortably. Then insert the new pads and lock them with the relative springs and finally the lower bar to which a new split pin must be applied.
Posted on 11 July 2023 by ScegliAuto
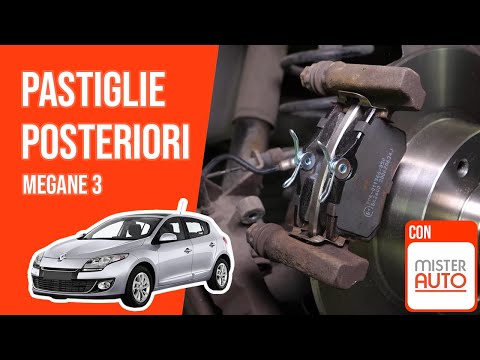 How to replace the brake pads on the Renault Megane 3
Renault Megane (2008-2015 / Megane III, Megane 3) We start the replacement of the brake pads of the Renault Megane 3 by opening the front hood and immediately after the brake fluid cap. We then proce 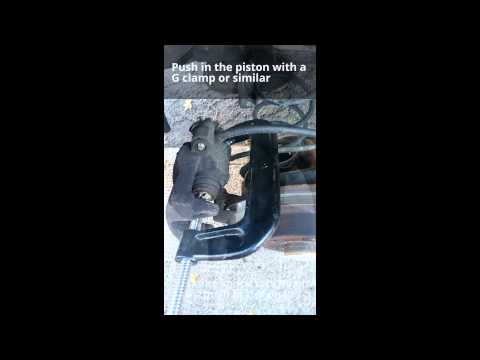 Replacing rear brake pads on Renault Megane
Renault Megane (2002-2010 / Megane 2) Let's see the replacement of the rear brake pads of a Megane. We lift the car on a column bridge with the respective pins. We unscrew the locking pin 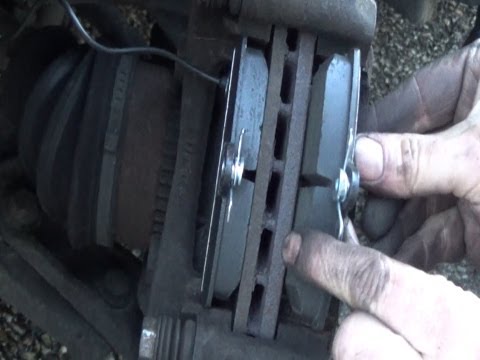 Replacement of front brake pads
Renault Megane (1995-2003 / Megane 1) Once the car has been raised, remove the front wheel to access the brake caliper; disconnect the wear sensor socket and proceed with the disassembly Other guides that may interest you
|
How do I replace the Land Rover Evoque auxiliary battery?
In order to replace the auxiliary battery of the Land Rover Evoque, it is necessary to go inside the passenger compartment and remove the panel which is positioned immediately under the glovebox. Once the screws that secure this panel have been loosened, it will be possible to access the components located in its rear part, including the auxiliary battery. The latter must be disconnected from its cables and the fixing screws must be loosened. The battery can then be replaced with a new one and the panel can be fixed again with its screws. by ScegliAuto More videos
|
|
For advertising on this site Write to info@scegliauto.com
ScegliAuto is not responsible for any inaccuracy of the data in the lists. To report any inaccuracy or your business (if you own the business in question), please write to info@scegliauto.com
Number of seconds to generate the page: 0.045
(c) ScegliAuto 2024 - info@scegliauto.com - Privacy Policy VAT number: IT01247470535 |