
|
Do it yourself
| |||
| ||||


How to change the air filter of the Seat Leon DIY (do it yourself)
Model: Seat Leon
MK 3, 5F
- Years 2012-2019
On your SEAT Leon, the replacement of the engine air filter is done by opening the hood and locating the air filter box (airbox) in the engine compartment. Before starting, work with the engine off and cold, and make sure you have the correct replacement part for your engine code/trim. Once you reach the air filter box, clear the access by moving any covers or hoses that may obstruct comfortable working without forcing anything. Open the airbox cover by releasing the clips or unscrewing the fastening screws (depending on the version). Lift the cover just enough to remove the old filter, being careful not to let any dirt fall into the intake duct. Remove the used filter and carefully clean the seat by removing leaves, dust, and debris, preferably using a cloth or gentle suction (without pushing dirt inward). Insert the new filter, ensuring the correct orientation and seating: it should rest properly along the entire perimeter, without folds or gaps. Close the airbox cover, reposition the clips/screws, and check that everything is in place. Once the work is finished, check that there are no gaps between the cover and the air filter box and that any hoses/ducts are correctly reattached: a poorly closed airbox can lead to unfiltered air intake and irregular operation.
Posted on 1 January 2026 by ScegliAuto
Video tutorial
Related tutorials
Seat Leon
(2005-2013 /
1P)
To replace the rear bumper of a Seat Leon, open the boot to access the screws next to the rear lights. By unscrewing these screws, you can remove the…
Seat Leon
(2005-2013 /
1P)
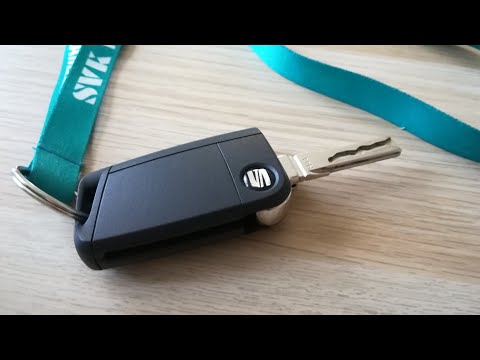
Before you start, open the physical key of your Seat Leon by simply pressing the silver button. Begin by prying off the rear cover of the key using a…

Seat Leon
(2020-2026 /
KL1, KL8)
In the following guide dedicated to all of you who own the latest series of the Seat Leon, you will find a description of the procedure you need to f…
Other guides you may be interested in
|
How to Open the Bonnet on the Lancia Y
To open the bonnet on this vehicle, follow these simple instructions: first, open the driver's door and locate the lever positioned just below the dashboard, marked with an image of the vehicle with the bonnet open. Pull this lever towards you until you hear a "click" indicating the bonnet is released. Next, exit the cabin and stand in front of the bonnet to disengage the safety catch and complete the opening. To do this, slightly lift the bonnet, locate the yellow lever underneath, and pull it to the left to fully release and open the bonnet. by ScegliAuto More videos
|

|
For advertising on this site Write to info@scegliauto.com
ScegliAuto is not responsible for any inaccuracy of the data in the lists. To report any inaccuracy or your business (if you own the business in question), please write to info@scegliauto.com
Number of seconds to generate the page: 0.865
(c) ScegliAuto 2026 - info@scegliauto.com - Privacy policy VAT number: IT01247470535 |
