
|
Do it yourself
| |||
| ||||


How to Replace the Diesel Filter on Suzuki Grand Vitara 2.0 TDI
Model: Suzuki Grand Vitara
MK 1
- Years 1999-2005
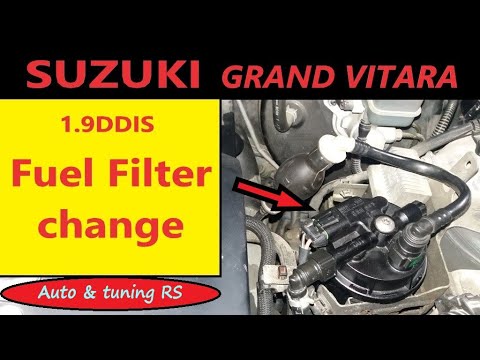
In this video, you will learn how to replace the diesel filter on a Suzuki Grand Vitara 2.0 TDI. Open the bonnet and locate the diesel filter (positioned next to the engine on the driver's side), disconnect the electrical connector and the pipes using the appropriate pliers by pressing the two release buttons on the pipe fittings. Using a Torx screwdriver, unscrew the fixing screw of the filter cap, lift the cap, and pull out the old diesel filter. Replace the seal on the fixing screw, clean the filter cap, and insert the new diesel filter with the writing facing the inside of the cap; remove the O-ring seal from the perimeter where you will later place the cap. With a lamp, check the bottom of the filter housing; you will see reflections of light caused by the presence of debris (if a significant amount of debris is visible, have the injection pump and injectors checked). Clean everything and position the new O-ring seal, then refit the cap with the new filter. Reconnect the pipes and the connector, and finally bleed the system using the manual pump next to the filter.
Updated on 9 April 2026 by ScegliAuto
Video tutorial
Related tutorials
Suzuki Grand Vitara
(1999-2005 /
MK 1)
Before you can begin, open the bonnet of your Suzuki Grand Vitara. Start by disconnecting and moving the hoses connected to the diesel filter, simply…
Suzuki Grand Vitara
(2005-2015 /
MK 2)
In today's tutorial, you will learn how to remove and replace the diesel filter on the Suzuki Grand Vitara, following the instructions below. First, …

Suzuki Grand Vitara
(2005-2015 /
MK 2)
In this tutorial, we will see how to replace the fuel filter in a Suzuki Grand Vitara, a very simple and quick operation. First, ensure that the engi…
Other guides you may be interested in
|
How to Check the Oil Level on a Jeep Renegade?
To check the oil level on a Jeep Renegade, you need to open the bonnet to access the components inside the engine bay: on the lower left side of the engine block, you will find the dipstick for checking the level. This should be pulled out and thoroughly cleaned with a cloth: once cleaned, reinsert it back into its tube and pull it out immediately after. This way, you can check that the oil mark is between the minimum and maximum levels; finally, you can place the dipstick back in its tube. by ScegliAuto More videos
|
|
For advertising on this site Write to info@scegliauto.com
ScegliAuto is not responsible for any inaccuracy of the data in the lists. To report any inaccuracy or your business (if you own the business in question), please write to info@scegliauto.com
Number of seconds to generate the page: 0.177
(c) ScegliAuto 2026 - info@scegliauto.com - Privacy policy VAT number: IT01247470535 |
