
|
Do it yourself
| |||
| ||||


Replacing the Air Filter on the Suzuki Swift
Model: Suzuki Swift
MK 6, A2L
- Years 2017-2024
At the scheduled maintenance interval for the Suzuki Swift, you must replace the engine air filter to keep it efficient and monitor fuel consumption. To do this, open the front bonnet, disconnect the intake hose on the left side of the filter box, unclip the two metal clips securing the cover, and lift it off to remove the old filter element. Replace it with a new one, ensuring it is positioned correctly. Refit the cover and secure it with the two clips, then reconnect the intake hose to its rubber holder.
Updated on 10 September 2026 by ScegliAuto
Video tutorial
Related tutorials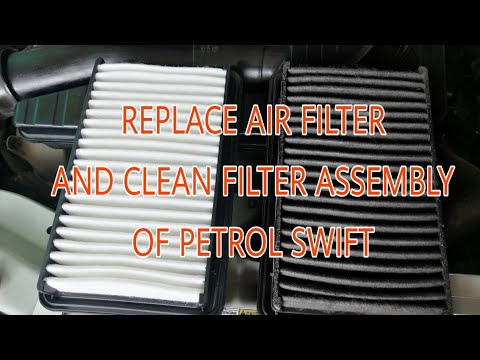
Suzuki Swift
(2004-2010 /
MK 4, Rs41)
How to remove the air filter from a Suzuki Swift? Let's see the removal and replacement procedure. Lift the front bonnet to access the area where the…

Suzuki Swift
(2004-2010 /
MK 4, Rs41)
The quality of the air breathed inside the cabin while using the air conditioning of your Suzuki Swift is guaranteed by the proper functioning of the…

Suzuki Swift
(2017-2024 /
MK 6, A2L)
To replace the engine air filter of your sixth-generation Suzuki Swift by yourself, you really only need a few minutes. All you have to do is read th…
Other guides you may be interested in
|
How to Open the Bonnet of a Renault Megane if the Lever is Broken?
If the lever that unlocks the bonnet of the Renault Megane is broken or not functioning, there is an emergency procedure to unlock the mechanism: remove the right front grille located at the top of the bumper. Once the grille is removed, you can locate the actuator mechanism: by pulling the spring in this position, you can unlock the actuator, allowing you to lift the bonnet and access the components located inside the engine compartment. You can then close the bonnet simply by lowering it. by ScegliAuto More videos
|
|
For advertising on this site Write to info@scegliauto.com
ScegliAuto is not responsible for any inaccuracy of the data in the lists. To report any inaccuracy or your business (if you own the business in question), please write to info@scegliauto.com
Number of seconds to generate the page: 0.200
(c) ScegliAuto 2026 - info@scegliauto.com - Privacy policy VAT number: IT01247470535 |
