
|
Do it yourself
| |||
| ||||


How to remove the engine air filter on a Toyota Yaris
Model: Toyota Yaris
Xp10
- Years 1999-2005 Let's see how to remove the engine air filter on a Toyota Yaris: open the car door, pull up the engine compartment opening lever at the bottom left of the dashboard and lift up the front hood, secure with the rod. We disconnect the plastic ventilation pipe, uncover the panel of the ventilation box and extract the worn air filter (with the special plastic hooks). We insert a new filter in the dedicated housing (making it adhere well around the walls). Finally we reassemble the panel of the air box and tighten with the appropriate hooks. We close the front hood at the end of the maintenance.
Posted on 29 October 2023 by ScegliAuto
 How to replace the air filter on a Toyota Yaris
Toyota Yaris (1999-2005 / Xp10) Replacing the air filter on the Toyota Yaris 1.0 petrol is very simple. First, we need to open the hood of the car and remove the four clips that sec 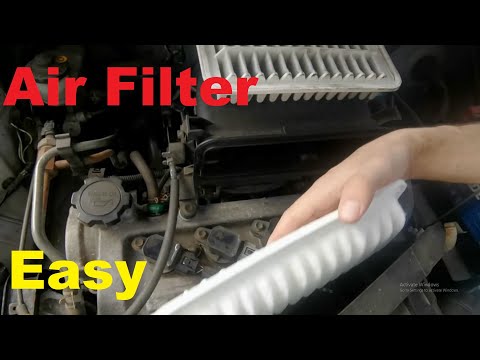 How to replace the air filter on the Toyota Yaris VVT-i
Toyota Yaris (1999-2005 / Xp10) Let's briefly see the necessary steps that will allow us to disassemble and replace the air filter of the Toyota Yaris engine, with VVT-i engine. Fir 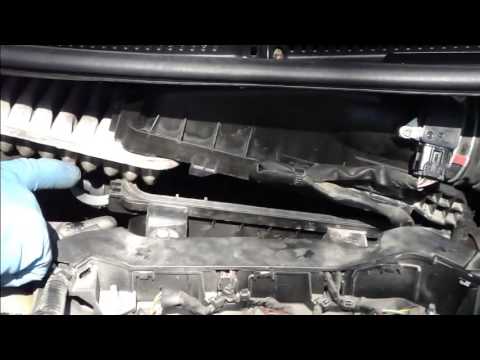 How do you replace the air filter of the Toyota Yaris?
Toyota Yaris (2005-2011 / Xp90) Replacing the air filter of the Toyota Yaris is done by opening the hood so that you have access to the top of the engine block. Here, you will need Other guides that may interest you
|
How to deactivate the safe lock on a Volkswagen Golf.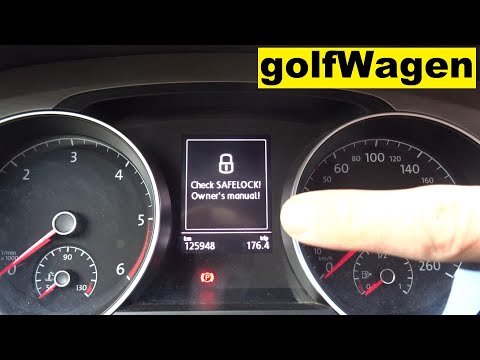
The safe lock is indeed an anti-theft system that prevents thieves from accessing the car. This device locks the doors, both externally and internally, when the driver activates the central locking remote control after leaving the vehicle. To permanently disable it, it is necessary to use a diagnostic program such as VCDS that we will connect to the vehicle through the ODBII port. Then wait for the connection and recognition of the control unit and then select the blocks present and locate the safe lock to disable it. And the job will be completed. by ScegliAuto More videos
|
|
For advertising on this site Write to info@scegliauto.com
ScegliAuto is not responsible for any inaccuracy of the data in the lists. To report any inaccuracy or your business (if you own the business in question), please write to info@scegliauto.com
Number of seconds to generate the page: 0.088
(c) ScegliAuto 2024 - info@scegliauto.com - Privacy Policy VAT number: IT01247470535 |