
|
Do it yourself
| |||
| ||||


Toyota Prius - Video tutorial
Model: Toyota Prius
MK 1
- Years 2004-2009 In this video you can see the replacement of the front bumper of a Toyota Prius. The tutorial begins with the replacement of the headlight bulb which in order to take place requires the removal of the headlight itself. The headlight is then repositioned and locked with three fixing bolts. The same operation is also carried out on the other lighthouse. The following images show the detachment phase of the clips that fix the bumper and the subsequent assembly of a new one: in this phase it is important that there is a correspondence of the holes for fixing the bumper using the clips and screws. The lower bumper is then mounted, fixed with screws and the plastic cover mounted by hooking the white clips and screws that hold it in place. The video then focuses on the upper part of the bumper which must be hooked by making the clips of the bumper adhere to the car body. All clips must be attached: both those placed on the outside of the headlights and those placed under them. The bumper is further fixed thanks to a screw (on each side) that joins it to the bodywork. Finally, the plastic cover is placed inside the engine compartment and fixed with some clips.
Posted on 5 July 2023 by ScegliAuto
 How to remove the front bumper of the Toyota Prius.
Toyota Prius (2009-2015 / Xw30, MK 2) .. us through the process of disassembling and replacing the front bumper of the Toyota Prius. First, we open the car's engine hood and start removing.. 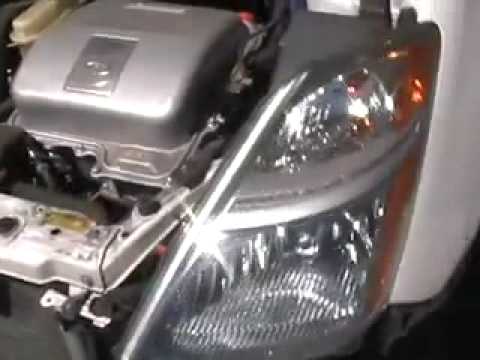 Removing the bumper and replacing the HID lamps
Toyota Prius (2004-2009 / MK 1) This video shows how to remove the front bumper of a Toyota Prius in order to replace its HID lamps (xenon lamps). First, using a screwdriver, you wi  How to remove the front bumper of a Toyota Prius
Toyota Prius (2009-2015 / Xw30, MK 2) Let's see how to remove the front bumper of a Toyota Prius. We raise the bonnet and put it in safety with the dipstick. With a plastic (metal) lever Other guides that may interest you
|
How do you open the fuel flap of the Volkswagen Golf 5?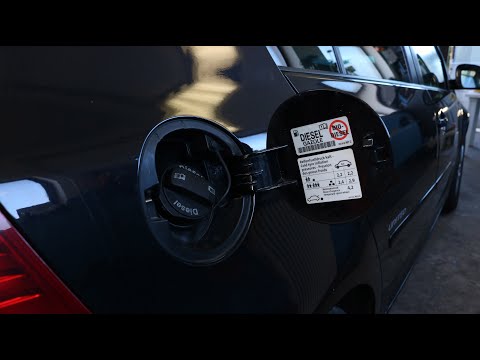
In order to open the fuel flap of the Volkswagen Golf 5, you need to press the appropriate button inside the passenger compartment, which is located in the rear part of the glove box on the driver's door. By pressing the button, the flap will unlock and it will then be possible to open it manually. Once the flap has been opened, the fuel tank access cap must be unscrewed. To close everything again, it will be sufficient to screw the tank cap again; subsequently, the flap must also be closed, pressing it so that it fits thanks to its locking mechanism. by ScegliAuto More videos
|
|
For advertising on this site Write to info@scegliauto.com
ScegliAuto is not responsible for any inaccuracy of the data in the lists. To report any inaccuracy or your business (if you own the business in question), please write to info@scegliauto.com
Number of seconds to generate the page: 0.094
(c) ScegliAuto 2024 - info@scegliauto.com - Privacy Policy VAT number: IT01247470535 |