
|
Do it yourself
| |||
| ||||


Toyota Yaris - Video tutorial
Model: Toyota Yaris
Xp130
- Years 2011-2019 Needed: t20 torx wrench, flat screwdriver, plastic U-shaped tool for car interiors, straight nose pliers. Procedure: remove the plastic triangle near the glass using the plastic tool. Remove the black molding using the plastic tool, unscrew the two torx inside. Remove the plastic cap on the opening handle and unscrew the torx inside. Insert your hands at the bottom by gently prying off the panel which is pressure mounted with 7 plastic clips) and once detached, remove the window lifter knob by removing the metal clip that locks it to the mechanism (use the straight nose pliers or one rag as in the video) At this point the panel is free, just pull it upwards. Disconnect the two door opening cables. To reassemble, follow the guide by reversing the procedure illustrated.
Posted on 13 December 2023 by ScegliAuto
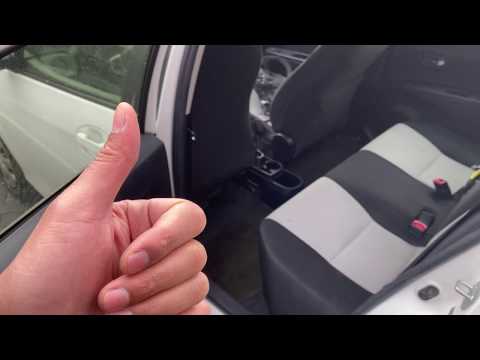 How to knock down the rear seats of a Toyota Yaris
Toyota Yaris (2005-2011 / Xp90) Before we begin, we will need to open the rear doors of our Toyota Yaris. Let's start by pulling up the two hooks positioned at the upper corners of 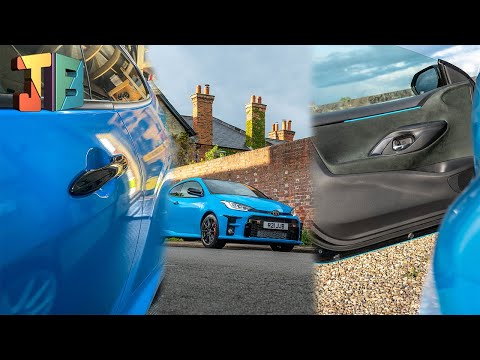 How to remove the door panel of a Toyota Yaris
Toyota Yaris (2020-2024 / MK 4) Before starting, we will have to open the front door of our Toyota Yaris. Let's start by disengaging and extracting the window lifter controls, and t 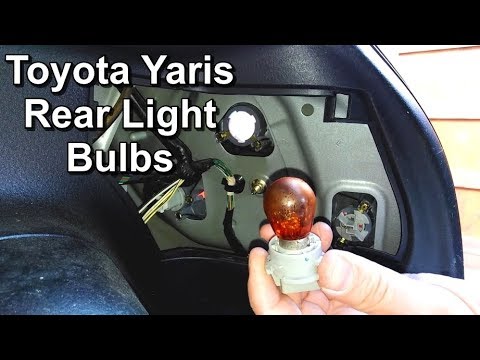 How to remove the rear light bulb of a Toyota Yaris
Toyota Yaris (1999-2005 / Xp10) Before we can start, we will have to go and open the tailgate of our Toyota Yaris. So let's start by unhooking the clips that secure the internal cov Other guides that may interest you
|
How do I replace the Land Rover Evoque auxiliary battery?
In order to replace the auxiliary battery of the Land Rover Evoque, it is necessary to go inside the passenger compartment and remove the panel which is positioned immediately under the glovebox. Once the screws that secure this panel have been loosened, it will be possible to access the components located in its rear part, including the auxiliary battery. The latter must be disconnected from its cables and the fixing screws must be loosened. The battery can then be replaced with a new one and the panel can be fixed again with its screws. by ScegliAuto More videos
|
For advertising on this site Write to info@scegliauto.com
ScegliAuto is not responsible for any inaccuracy of the data in the lists. To report any inaccuracy or your business (if you own the business in question), please write to info@scegliauto.com
Number of seconds to generate the page: 0.067
(c) ScegliAuto 2024 - info@scegliauto.com - Privacy Policy VAT number: IT01247470535 |