
|
Do it yourself
| |||
| ||||


Toyota Rav 4 headlight replacement
Model: Toyota Rav 4
Xa20, MK 2
- Years 2000-2006 We see the replacement of the headlight on a Toyota Rav 4. We lift the front hood of the car, let's put it in safety. We remove the central grille and the piece of bodywork under it: there are the tightening screws under the stone guard of the wheel. At the end of the removal of the covers, we just have to unscrew the clamping screws of the headlight: unscrew all the screws and disconnect the electrical clamp located behind the headlight. We mount the new headlight with the new bulbs if damaged and (always suitable type and size) we insert the headlight in its housing, tighten all the screws and fix the plastic covers.
Posted on 1 January 2024 by ScegliAuto
 Headlight replacement on Toyota Rav 4
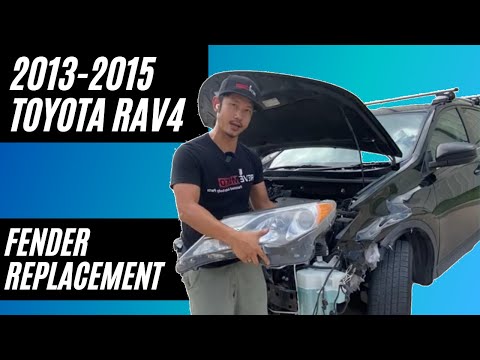
Toyota Rav 4 (2013-2018 / Xa40, MK 4) Today we will show you how to remove the headlights on Toyota Rav 4. After lifting the hood and securing it, unscrew the two upper bolts, then move o  How to replace the Toyota RAV 4 headlight bulb
Toyota Rav 4 (2013-2018 / Xa40, MK 4) If you want to find out how to replace the headlight bulb on your Toyota Rav 4 fourth series (year 2013-2018), just read the following instructions c 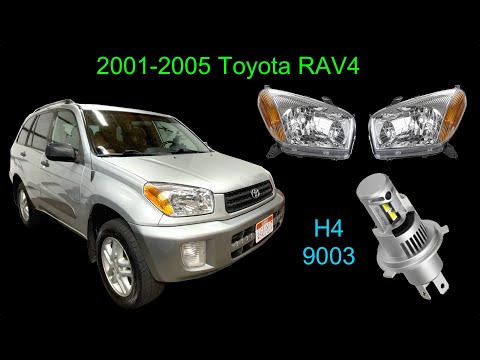 How do you replace the front headlight of the Toyota RAV 4?
Toyota Rav 4 (2000-2006 / Xa20, MK 2) In order to replace the front headlight of the Toyota RAV 4, you need to open the hood so that you can loosen the seven screws that secure the upper Other guides that may interest you
|
How to deactivate the safe lock on a Volkswagen Golf.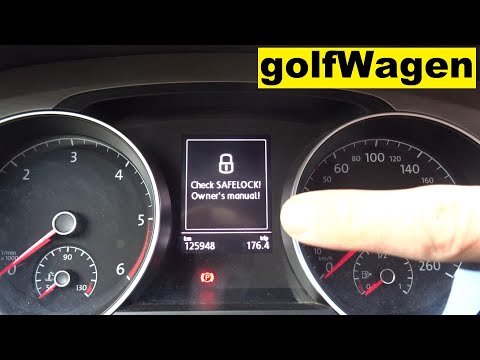
The safe lock is indeed an anti-theft system that prevents thieves from accessing the car. This device locks the doors, both externally and internally, when the driver activates the central locking remote control after leaving the vehicle. To permanently disable it, it is necessary to use a diagnostic program such as VCDS that we will connect to the vehicle through the ODBII port. Then wait for the connection and recognition of the control unit and then select the blocks present and locate the safe lock to disable it. And the job will be completed. by ScegliAuto More videos
|
|
For advertising on this site Write to info@scegliauto.com
ScegliAuto is not responsible for any inaccuracy of the data in the lists. To report any inaccuracy or your business (if you own the business in question), please write to info@scegliauto.com
Number of seconds to generate the page: 0.058
(c) ScegliAuto 2024 - info@scegliauto.com - Privacy Policy VAT number: IT01247470535 |