
|
Do it yourself
| |||
| ||||


How to store rest periods on the digital tachograph VDO of a commercial vehicle
Model: (Various brands) Various
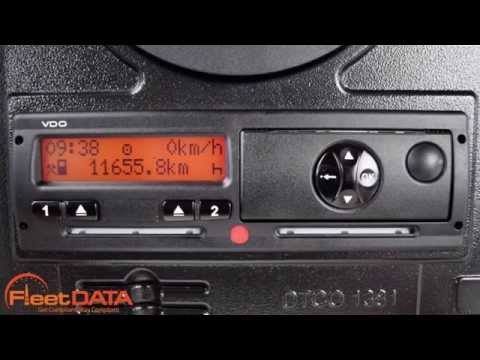
In this video we see how to store driver data on the tachograph. We turn on the ignition and insert the smart card into the device: the date and time of the last release will appear. The request to store the data from the date of the last release will appear, then the message "M entrance add" will appear: we will have to press "Ok". When asked "end of shift" answer no and press "ok" again. The last release is indicated at the top of the display, in the lower part we must indicate the date and time of insertion, which we will do by holding the up arrow until selecting the current time and date. Select "ok". Select the bunk corresponding to the break. We will be asked to confirm and press "ok". Wait for the recognition of the tachograph card and then carry out our activity.
Posted on 26 November 2024 by ScegliAuto
Video tutorial
Related tutorials
(Various brands) Various
We can see how the VDO, namely the digital tachograph, of a commercial vehicle works, explained by someone who uses it every day: at the top we see t…
(Various brands) Various
The process for changing the time on a Siemens VDO digital tachograph may vary slightly depending on the model and version of the tachograph. However…

(Various brands) Various
In this video, we can see how to set daily rest on the digital tachograph: with the card inserted, press button number 1 a couple of times until the …
Other guides you may be interested in
|
Frequently Asked QuestionsHow to Replace the Remote Battery for the Volvo XC40?
In this tutorial, you will see how to replace the battery in the remote for the Volvo XC40, a very simple and quick operation. For this, you will need a replacement battery of type CR2032 and possibly a small flathead screwdriver. First, remove the front cover by pressing the button on the metal ring, then locate the second button, press it as well, and remove the opposite cover. Next, open the circular cap, take out the old battery, and insert the new one in the opposite direction. Finally, reassemble everything. by ScegliAuto More videos
|
|
For advertising on this site Write to info@scegliauto.com
ScegliAuto is not responsible for any inaccuracy of the data in the lists. To report any inaccuracy or your business (if you own the business in question), please write to info@scegliauto.com
Number of seconds to generate the page: 0.106
(c) ScegliAuto 2026 - info@scegliauto.com - Privacy policy VAT number: IT01247470535 |
